
If you’ve ever cut into a pie and discovered a pale, almost translucent soggy bottom, blind baking the crust is the fix. Blind baking a vegan pie crust means pre-baking the crust before it’s filled so it bakes up crisp, golden, and sturdy enough to hold whatever filling you pour into it. It’s the step that takes my Vegan Pumpkin Pie and Vegan Pecan Pie from good to bakery-level and it works with both homemade and store-bought crusts.
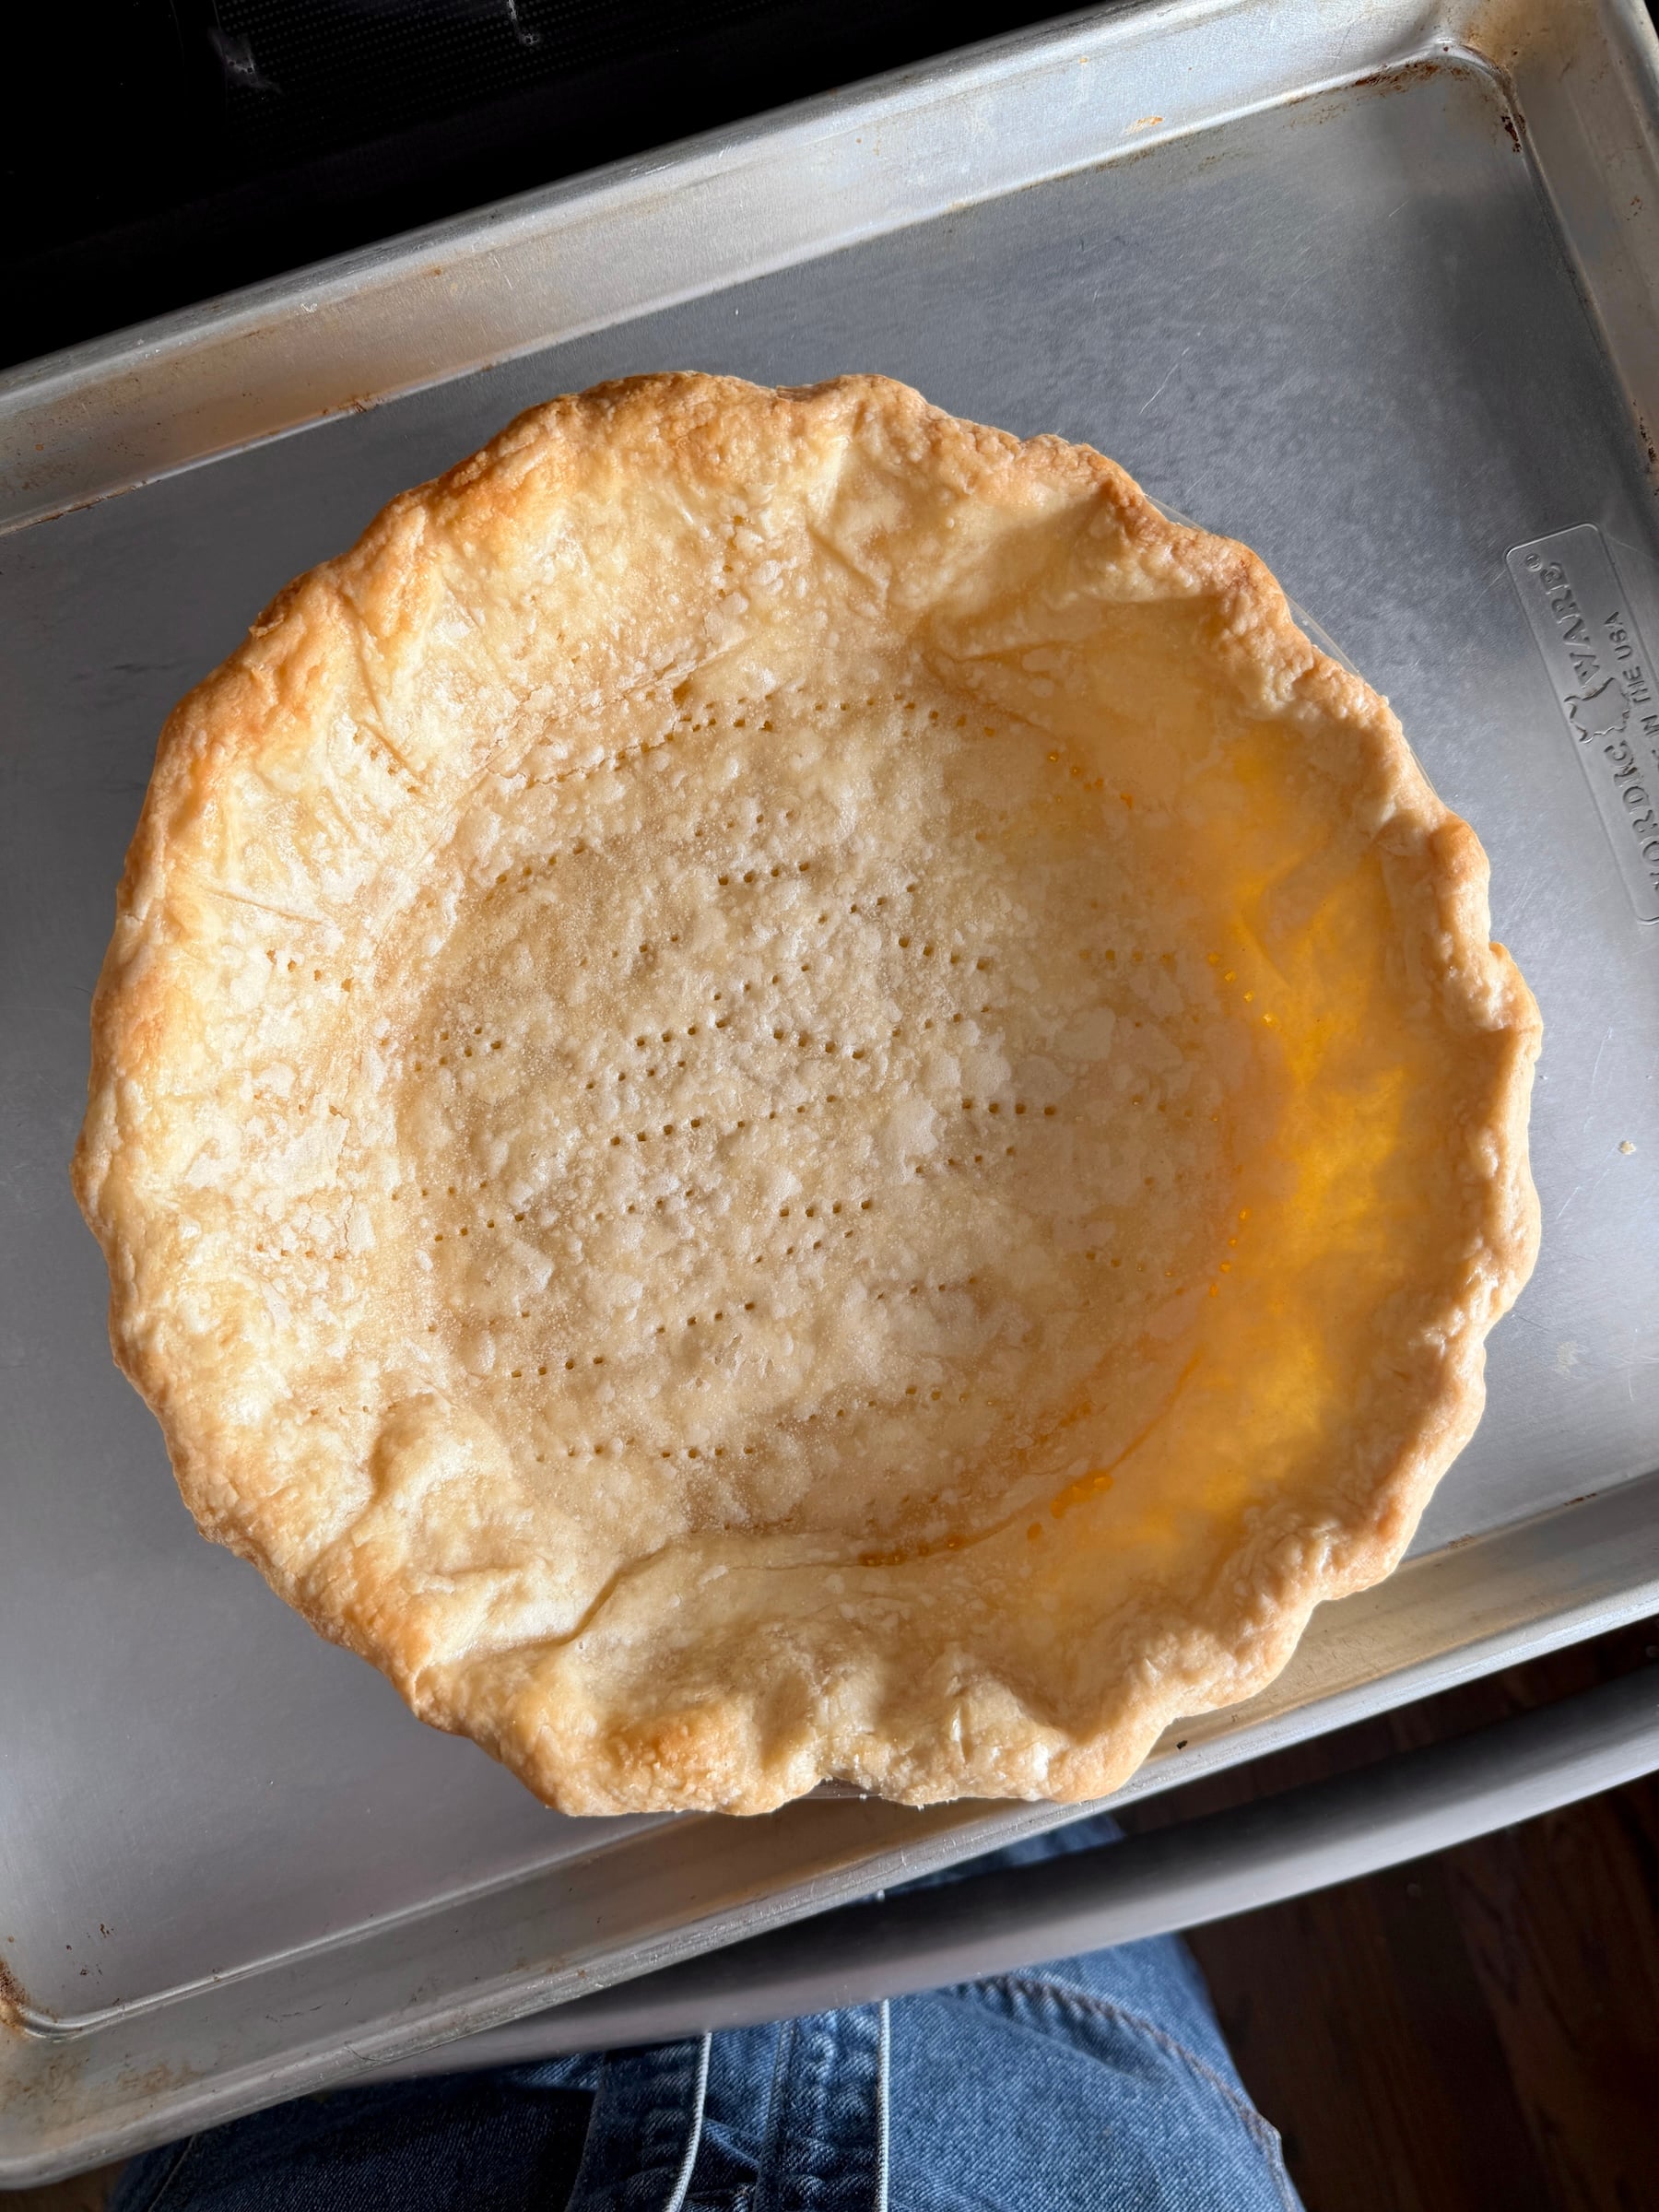
Blind Baked Vegan Pie Crust Overview
- 📝 Recipe Name: How to Blind Bake a Vegan Pie Crust
- 🕒 Ready In: 30 minutes to 2 hours (if fully cooling)
- 🍽️ Makes: One 9-inch crust
- 🌱 Main Ingredients: One unbaked vegan pie crust (homemade or store-bought), plus pie weights
- 📖 Dietary Info: Vegan, dairy-free
- 😍 Why You’ll Love It: A crisp, golden crust with no soggy bottom, ready for any filling, baked or no-bake.
Table of Contents
What is Blind Baking?
Blind baking is the process of baking a pie crust before the filling goes in. There are two ways to do it, depending on your pie:
- Fully baked: For no-bake fillings like cream pies or chocolate mousse pie, the crust is baked until it’s fully cooked and golden brown, then cooled before filling.
- Partial baked (par-baked): For fillings that bake in the crust, like pumpkin or pecan, the crust gets a head start in the oven. This helps the bottom bake up crisp and golden rather than soggy and pale.
What You’ll Need
Pie dish: I use a standard 9-inch glass pie dish (Pyrex or Anchor Hocking). Glass lets you check that the bottom is browning. Metal and ceramic work too; see the notes in the recipe card for how to adjust.
Pie weights: These keep the crust from puffing up and hold the sides in place. A standard 9-inch pie crust takes about 3-4 cups of weights. Fill the crust all the way to the rim to keep the sides from slumping. I like ceramic pie weights, but you can use dried beans, uncooked rice, or even granulated sugar. Most ceramic weights come in small bags, so you’ll need to buy a few.
Parchment paper: Crumple it up and then smooth it out to help it conform better to your crust. I use two sheets — it makes it easier to lift out the weights without ripping. You can use aluminum foil too, but parchment is less likely to stick.
Metal baking sheet: It catches drips and makes it easier to move your hot pie dish in and out of the oven. It also helps conduct heat to the bottom of the crust for better browning. Use a room-temperature sheet with glass or ceramic dishes. If using a metal pan, you can preheat the baking sheet in the oven for an extra crispy crust.
Fork: To prick the bottom of the crust after the weights are removed. This keeps the crust from puffing up at the end of the bake.
Foil or a pie shield: To tent the edges of the pie crust if they brown before the bottom is done.
How to Blind Bake a Vegan Pie Crust
Step 1 – Freeze crust and preheat oven. Freeze your shaped crust for at least 30 minutes (ideally longer). Preheat the oven to 375°F with a rack in the lower third. If you’re using a glass or ceramic pie dish, let the frozen crust sit on the counter for 10 minutes before baking.
Step 2 – Line the pie crust with parchment paper (or foil). Fill to the top with pie weights.
Step 3 – Set the pie on a metal baking sheet and bake for 20 to 30 minutes, until the edges look set and are starting to brown. Lift a corner of the parchment to check for doneness. The dough underneath should look dry, not wet or raw.
Step 4 – Carefully remove the parchment and weights. Prick the bottom of the crust with a fork to keep it from puffing.
Step 5 – For a par-baked crust, bake 5 to 10 minutes more, until the bottom looks set and is starting to take on color. Add the filling while the crust is hot, adjust the oven temperature as needed, and bake according to your pie recipe.
For a fully baked crust, bake 15 to 20 minutes more, until the bottom is evenly golden brown. Tent the edges with foil if they’re getting too dark.
Step 6 (fully baked crust only) – Allow the crust to cool fully (at least 1 hour) before adding your no-bake filling.
Sarah’s Tips for Success 📝
- Keep your crust from shrinking. Shrinkage usually comes down to one of these issues:
- The dough was stretched into the pan. When transferring your rolled-out crust to the pan, lift and gently ease the dough into the corners rather than pulling it.
The crust wasn’t cold enough. Warm fat melts before the crust can set. Make sure to freeze your crust for at least 30 minutes (ideally longer) before baking.
Not enough weights. The weights are what hold the sides up. Make sure the weights reach the rim of the crust. If you’re buying ceramic weights, you will likely need to buy a few bags.
Dough was overworked. If you knead or handle your dough too much, it overdevelops the gluten.
Dough was too wet. Extra water makes crusts tougher and more likely to shrink. When following any pie crust recipe, use just enough water to bring the dough together. If it’s sticky or tacky, there’s likely too much water.
- The dough was stretched into the pan. When transferring your rolled-out crust to the pan, lift and gently ease the dough into the corners rather than pulling it.
- Prick the bottom again after the weights come out. Crust puffs up when steam is trapped underneath. When you take out the weights, make sure to prick the bottom of your crust all over with a fork to allow steam to escape. Prick all the way to the bottom. Even if your crust was pricked before it went in the oven, the holes can sometimes seal during that first portion of the bake.
Blind Baking Vegan Pie Crust FAQs
Bake at 375°F with the rack in the lower third of the oven. Bake with weights for 20 to 30 minutes, then remove them and bake 5 to 10 minutes more for a par-baked crust, or 15 to 20 minutes more for a fully baked crust.
You don’t have to buy ceramic pie weights. You can use dried beans, uncooked rice, or even white sugar. You do need something to weigh the crust down, both to keep the bottom from puffing up and to keep the sides from shrinking or slumping into the pan.
Yes. If you’re using a frozen pie shell that comes in a disposable foil pan, bake it directly from the freezer and begin checking at 15 minutes, since these crusts are thinner and the pans are also very thin.
Yes, you can also use aluminum foil. Parchment is just less likely to stick to the crust.
Did You Make This Recipe?
If you’ve made this recipe and loved it, please leave a 5-star rating and review below! Also, if you post a picture on Instagram and tag me @sarahsvegankitchen_, I’d love to see your work.
How to Blind Bake a Vegan Pie Crust
Almost done! Check your inbox to confirm, and the recipe is on its way.
Equipment
- parchment
- 3-4 cups Pie weights or dried beans, or uncooked rice
- metal baking sheet
Ingredients
- 1 unbaked 9" vegan pie crust, homemade or store-bought, shaped in the pan and frozen
Instructions
- Preheat oven to 375°F with a rack in the lower third.
- Take your shaped crust out of the freezer. If using a glass or ceramic pie dish, let it sit on the counter for 10 minutes first, since sudden temperature changes can crack it.
- Crumple two sheets of parchment paper, then smooth them out and lay them in the crust in a crisscross, so they cover the edges. (Foil can also be used.) Fill with pie weights, dried beans, or uncooked rice all the way to the top and gently press them into the corners.
- Set the pie on a metal baking sheet and bake for 20 to 30 minutes, until the sides look set and are starting to turn golden. (Metal tins will heat fastest, while glass and ceramic take longer.) Lift a corner of the parchment to check. The dough underneath should look dry, not wet or raw.
- Carefully lift out the parchment by its corners with the weights inside. Prick the bottom of the crust lightly with a fork to keep it from puffing up.
- For a partially baked crust (for baked fillings like pumpkin or pecan pie), bake 5 to 10 minutes more, until the bottom looks dry and starting to turn golden. Add the filling while it's still hot and bake as your recipe directs.For a fully baked crust (for no-bake fillings), bake 15 to 20 minutes more, until the bottom is golden throughout. Tent the edges with foil once they're almost the color you want.
- For a fully baked crust, cool completely, at least 1 hour, before filling.
Notes
The nutrition information provided on Sarah’s Vegan Kitchen is an estimate and is offered for general informational purposes only. Values will vary depending on the specific brands and amounts used.
Ads keep our recipes free. If you’d rather cook without them, go ad-free for $5/month →


