Updated March 2025. We took your feedback and boosted the flavor in the marinade. It’s a massive improvement!
Alright, y’all, listen up. I am a FIEND for jerky. As a kid, I would beg our babysitter to take us to 7-Eleven so that I could get a bag of Jack Link’s Beef Jerky and a Slurpee the size of my arm (I was a kid; my arms weren’t that big). The salty and exceptionally chewy nature of the jerky just really satisfied something deep in my soul.
Fast forward to now. Eating meat is like, totally cancelled, but my yearning for jerky lives on. I fell in love with Louisville Vegan Jerky but there’s a limit to how many bones I’m willing to drop at our local Whole Foods to secure it. So Sarah had the bright idea (as she does) to buy some soy curls in bulk and put my flavor game to the test.

Table of Contents
Why You’ll Love This Vegan Jerky
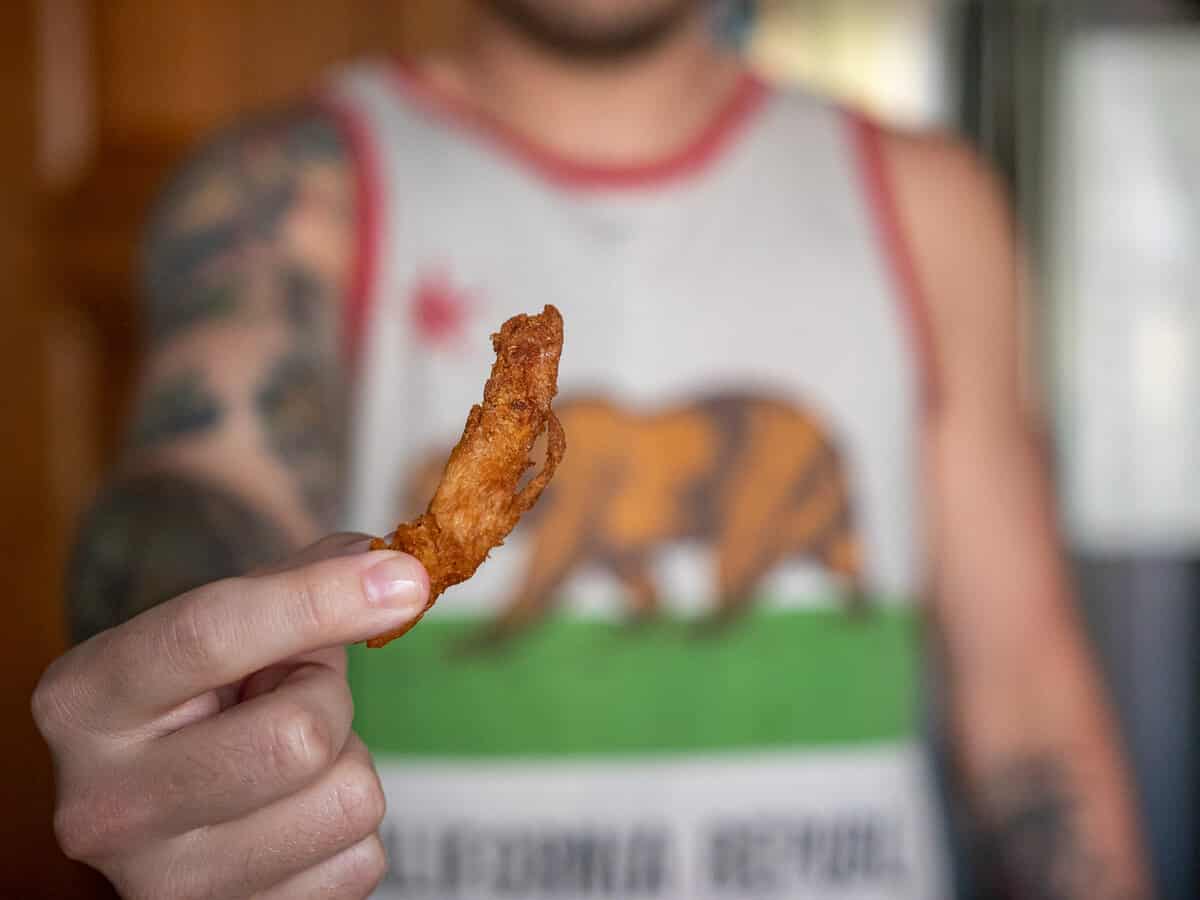
Now, I don’t want to overreact but…this jerky might be one of the best things I’ve ever made. In my opinion, it’s the perfect snack food. It’s salty, spicy (at least with the amount of cayenne that I prefer), and absurdly flavorful.
As an added bonus, it’s HEALTHY! Soy curls are packed with protein and are also a great source of fiber. You won’t feel like you just scarfed down some potato chips or anything greasy after eating this jerky; you’ll feel like a satiated, musclebound hunk of a human being. (Results may vary.)
Finally, soy curls are very affordable! You can buy theme straight from the Butler website (as we do) or on Amazon. It’s a fraction of the cost of Louisville Vegan Jerky, but just as delicious.
So there you have it: a healthy, cheap, and satisfying snack for any situation you may find yourself in. Hiking for 7 hours and need to refuel your legs with protein? Jerky. On a road trip and need to recoup the energy so you can continue to be a good DJ for your friend driving? Jerky. Watching a movie and don’t want to snack on chips? JERKY! Enjoy these chewy little guys however and wherever you so please.
If you make this at home, take a photo and tag me @theericames!

Ingredients for Homemade Vegan Jerky
- Soy curls: These extremely versatile little squiggles of soy are the basis of this vegan jerky recipe. They’re perfectly bland on their own and soak up anything you put on them. In my opinion, they’re basically like little pieces of plain chicken.
- Olive oil: A little bit of oil provides just enough fat to keep the soy curls from drying out in the oven. You can use a different neutral vegetable oil if you prefer.
- Soy sauce: Soy sauce provides all of the salt and a splash of umami for our homemade vegan jerky. Make sure you’re using full-sodium soy sauce for this recipe or it won’t have the right amount of salt!
- Liquid smoke: This gives the jerky that smoked barbecue taste that’s familiar in beef jerky. If you prefer not to cook with liquid smoke, you can substitute in 1/2 teaspoon smoked paprika. The flavor will be a bit different but it will still be tasty.
- Maple syrup: A little sweetness goes a long way.
- Vinegar: White vinegar adds a little acidic kick for your tastebuds. You can use apple cider vinegar as well.
- Spices: These are the tastemakers, as I like to call them (starting right now). Garlic and onion powder are the spice base, ramping up the umami. Paprika adds a peppery (but not spicy) flavor while the ground mustard and black pepper contribute a little bite to the mix. To round it out, add as much cayenne pepper as you like to spice up your vegan jerky.
How to Make the Best Vegan Jerky
Don’t be intimidated; this recipe is super easy to throw together! Here are the steps:
- Rehydrate your soy curls. Put them in a large bowl and pour over enough boiling water to cover. Allow them to sit for around 10 minutes before draining them off.
- Remove excess liquid. When your soy curls are cool enough to handle, squeeze out as much excess liquid as possible so they’ll absorb the marinade. We like to wring them out in batches using a nut milk bag — it works super well! You can also use a clean, lint-free kitchen towel. You can do it with just your hands too, but it’s harder to get them as dry this way.
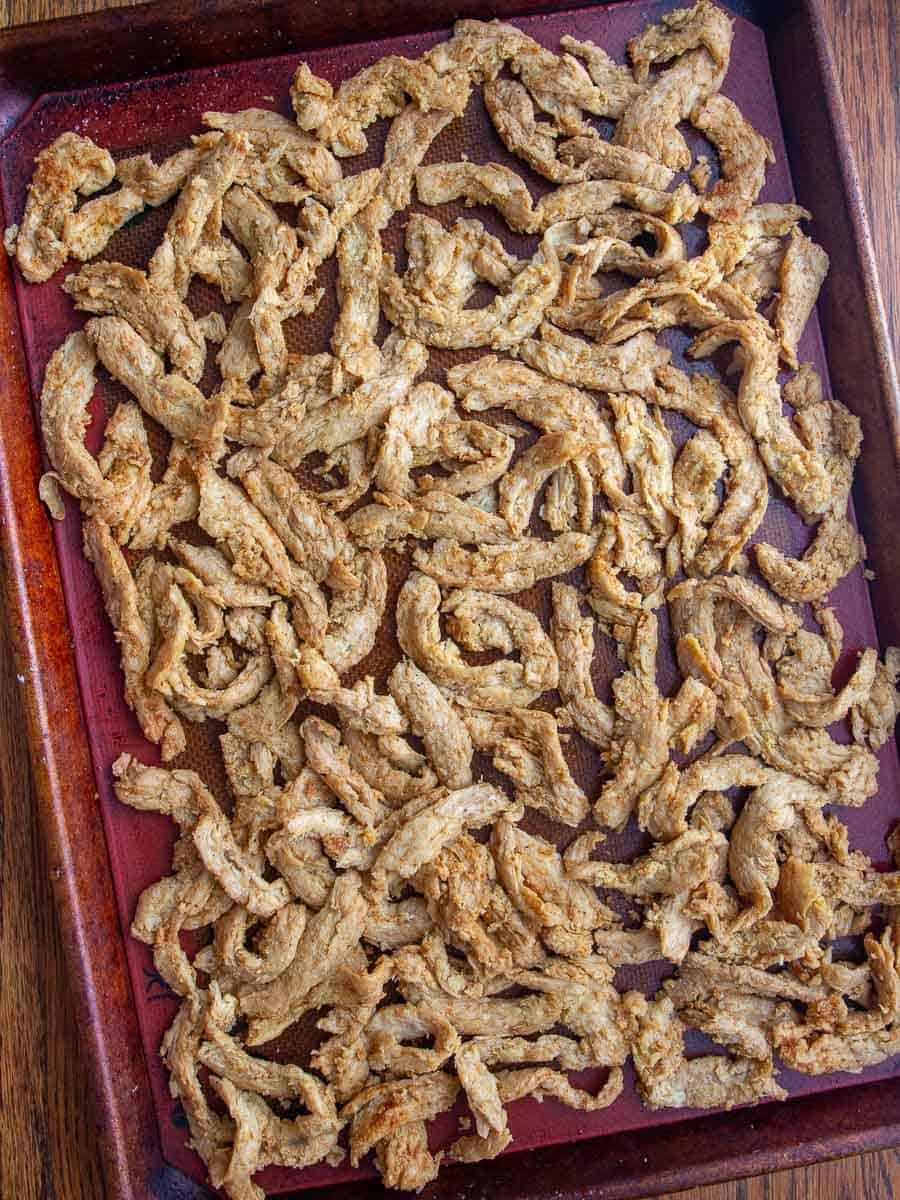
- Season your soy curls. Whisk all the marinade ingredients together in a small bowl. Pour over your soy curls and toss well to combine. If you squeezed out most of the extra liquid, they should soak up the marinade like a sponge.
- Slow-cook, stirring often. Spread the seasoned soy curls in one even layer on a baking tray and cook them in a low oven, stirring them every 20 minutes or so to ensure they dry out evenly.
- Let them cool. You can eat it right away, but the texture of this homemade vegan jerky is best once it’s had a chance to cool and sit for several hours in an airtight container. The moisture redistributes in the sealed container and the jerky develops an amazing chew.
How to Store the Jerky
You can store your homemade vegan jerky in an airtight container at room temperature up to 5 days, but ours almost never lasts that long! You can refrigerate or even freeze it if you think you might take longer to go through a batch.
Make sure the jerky has cooled entirely before storing it. If it’s still hot, moisture will accumulate in the container and may cause the jerky to develop mold.
FAQ & Troubleshooting
Usually it’s easiest to just buy soy curls online. You can find them on Amazon or purchase directly from the Butler Foods website — sometimes they even throw in free samples of their other products, too!
Occasionally we also spot 8 oz bags of soy curls at health food stores (Natural Grocers sells them, for example). If you have a vegan specialty market near you, that’s also a great place to check.
Yes! Soy curls are naturally gluten-free, so you’ll simply need to use gluten-free soy sauce (or gluten-free tamari or liquid aminos).
Unfortunately, we haven’t had good luck with this. A small amount of oil is necessary to make the soy curls retain just the right amount of moisture. Otherwise they become too dry and crispy in the oven.
The time listed is just a guideline. There are a few variables at play:
How well did you squeeze out the extra water from the soaked soy curls? If they were still a little soggy, you may needed to add extra cook time. Add it in 5 minute increments.
All ovens are a little different. An oven thermometer is useful to ensure your temperature is accurate.
The humidity of your kitchen will influence the result a bit, too.
More Vegan Soy Curl Recipes


Eric’s Original Vegan Jerky
Equipment
- mixing bowl
- cheesecloth, nut milk bag or lint-free kitchen towel
- large baking tray
- silicone baking mat or parchment
Ingredients
- 1 8 oz bag dry soy curls
- 1/4 cup olive oil
- 1/3 cup soy sauce regular, not low-sodium
- 1/2 tablespoon liquid smoke
- 1 tablespoon vinegar white or apple cider
- 1 tablespoon maple syrup
- 1 teaspoon paprika
- 1 tablespoon onion powder
- 1 tablespoon garlic powder
- 1 teaspoon ground mustard
- 1/2 teaspoon cayenne pepper optional
- black pepper to preference
- 1/4 teaspoon kosher salt
Instructions
- Preheat oven to 250°F. Line a large baking tray with parchment or a silicone baking mat.
- Cover soy curls with water just off a boil. Allow to soak for 10 minutes to rehydrate.
- Drain soy curls and allow to cool. (You can rinse them under cold water to speed up this process.) Using a clean tea towel, a nut milk bag, or a few layers of cheesecloth, wring out as much excess liquid as possible from the curls. It helps to work in small batches.
- Add soy curls to a large mixing bowl and set aside.
- In a small bowl, combine all marinade ingredients. Whisk to ensure everything is combined well. Feel free to taste a piece and adjust seasonings to preference, if desired. (Keep in mind that the flavors will concentrate as we dehydrate the jerky, so the finished product will taste saltier.)
- Pour marinade evenly over soy curls and mix thoroughly to combine. You want to ensure that each piece of jerky has the same amount of marinade so you don't get any bland or overly flavored pieces.
- As evenly as possible, spread soy curls on prepared baking tray.
- Bake for roughly 1 hour. Every 20 minutes, give the soy curls a thorough stir and spread them out evenly again before returning to oven.
- You may need to cook the jerky slightly longer to fully dehydrate it. If there is still some excess moisture after 1 hour, give the jerky another stir and continue baking it in five-minute increments until done. We typically end up cooking ours for an extra 10-15 minutes.
- The jerky will be tasty right out of the oven, but the texture is best after it’s been cooled completely and then stored in an airtight container for a few hours or overnight! In a sealed container, it develops an even better chew, and any pieces that initially seem dry will reabsorb some moisture. Just make sure to cool it before sealing, otherwise condensation will form in the container and the jerky will go bad faster.
Pingback: Vegan Chicken Salad - Sarah's Vegan Kitchen
Does substituting Dijon for ground mustard make much of a difference?
I’m not exactly sure how much you would use in place of ground mustard, but you can try it! It will also add a bit more moisture to the marinade.
I used the same amount of a wet mustard with seeds in it and increased the cook time by about 5 or 10 minutes. This recipe is bomb as a base, and you can do all kinds of stuff with it. I used soy chunks instead of curls and arbol powder instead of cayenne. If you don’t have dry mustard, just cook a bit longer to get rid of that excess moisture.
Can you tell me if the above recipe is the one that you modified to make more marinade?
It is!
Yummmmmm! This was delicious! Great recipe!
Is it possible to make these in an air fryer?
It is possible but it is considered extremely rude. Please do not make this in an air fryer. Please just be polite.
If you can get your air fryer low enough, I’m sure it would work roughly the same! Just keep an eye on them.
I’m planning on making your vegan jerky recipe but wanted to know how would you prepare in a air fryer oven/dehydrator
Sadly I made this and it has very little, if any, flavor. Maybe because I doubled the recipe? Weighed the soy curls (I buy in bulk), measured everything carefully, squeezed dry in a nut milk bag, and baked until dry-ish. I guess I’ll go back to winging it. It seemed like there wasn’t enough sauce once mixed as the sauce itself had good flavor and enough salt. Off to try to save the batch somehow. Might try again with 1 1/2 – 2 times the sauce
I agree with this assessment. The recipe would benefit from more salt/soy sauce, more liquid smoke, seasoning, and maybe a little sweetness (I plan on remaking it with 1.5x the marinade to see how that works). It is a good base recipe, though.
Thank you both for the valuable feedback! I went back and re-tested the recipe and made some changes in order to make the jerky more flavorful. I would love for you to try the updated recipe and let me know what you think!
I really enjoy the updated recipe! Thanks so much for sharing it!
Have you guys tested this with just whatever your favorite pre made bbq sauce is? And if it worked out for you or not?
I just made this, and it’s so delicious! I can’t stop eating it right out of the oven. It won’t be easy to save some to cool down and store, except that I am curious about how the texture will change.
Hi… quick question: How do you think it would work if you dehydrated the soy curls with the marinade mixed with water instead of just plain water? I feel like the flavor would penetrate the soy rather than staying in the outside. Thoughts?
Made these and they turned out great! Lots of flavor. I was out of soy sauce, so I subbed tamari. I have some dark soy sauce I’d love to use up, too, so I might experiment with that for the next batch. Thanks for the great recipe!
This is my go-to jerky recipe. I’m glad you updated the marinade amounts as I’ve always upped the amounts for just about everything that goes in. I made it today and it sings! (Though midway through, I sprinkled with more garlic powder and salt.) Also, I added nearly a tablespoon of sriracha to the marinade, left out the cayenne, and really like how that turned out. Thanks so much for this great recipe!
Thanks for the awesome recipe. Never buying vegan jerky again! Yum!!!
Just wondering if these can be dried out in a dehydrator.
How would these work if I used a dehydrator instead of the oven?