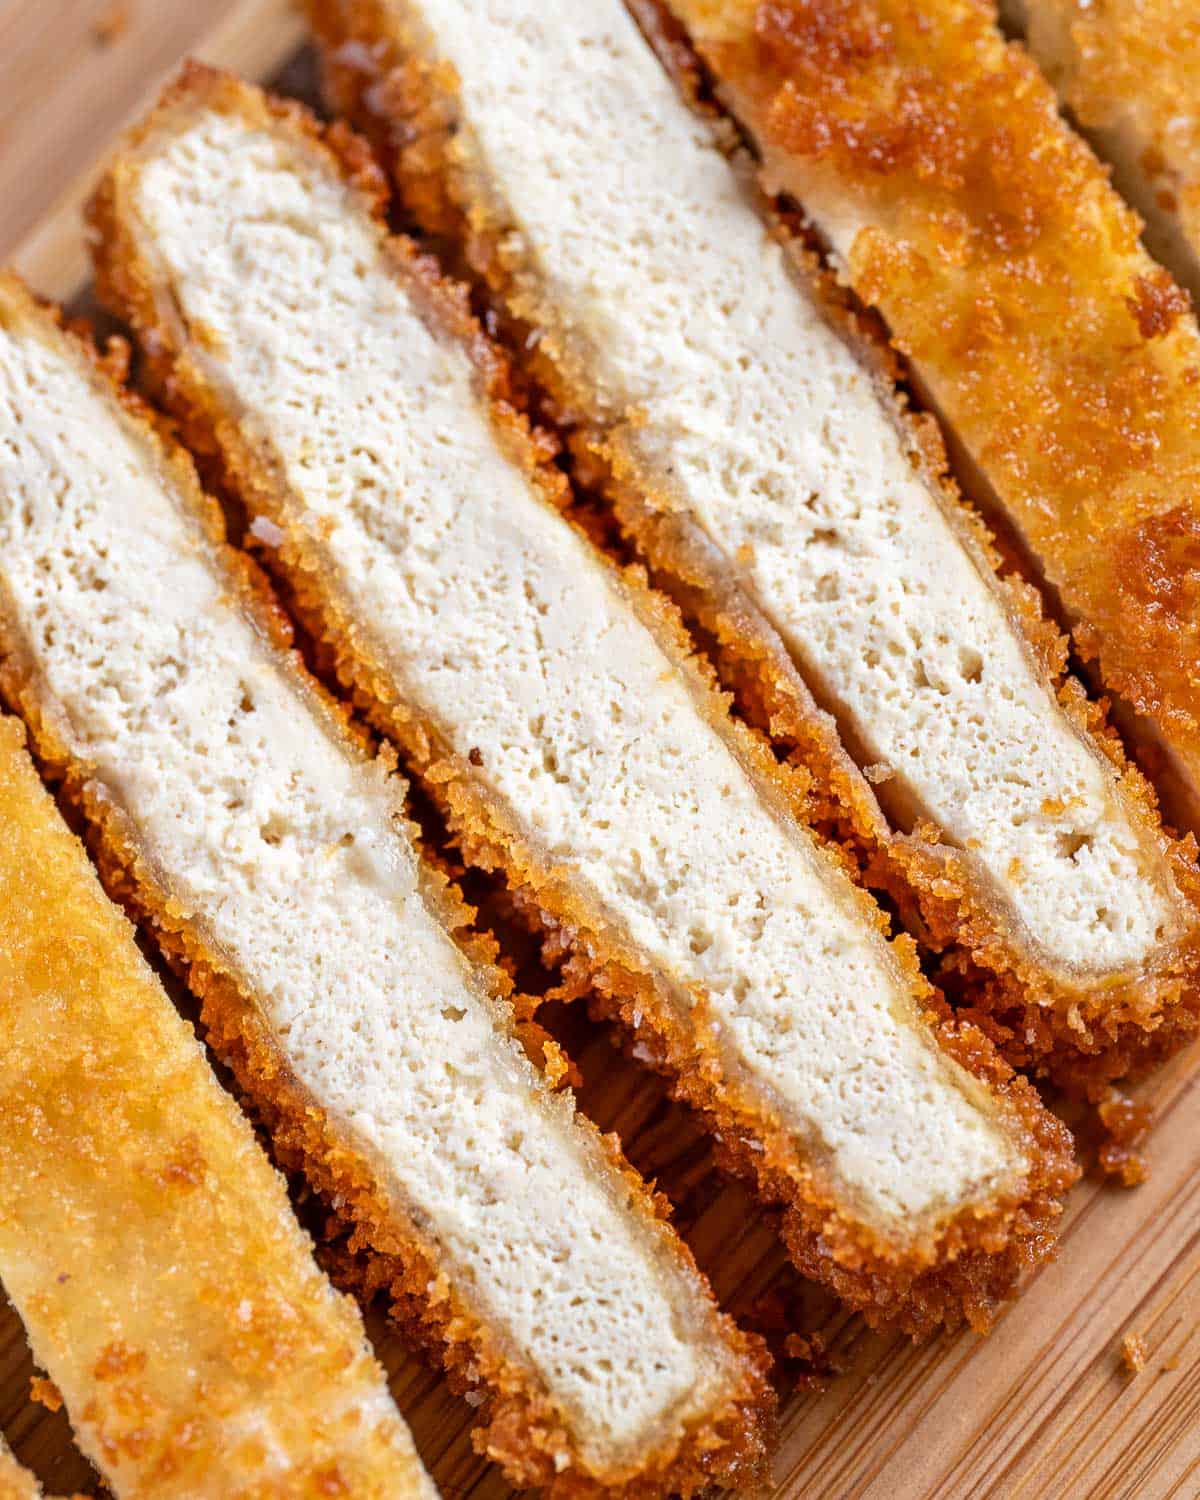
With a perfectly light and crisp panko breading, this plant-based tofu katsu recipe is a guaranteed crowd-pleaser. I think even picky kids or tofu skeptics can enjoy this one. It’s a versatile protein option that pairs beautifully with rice, Japanese curry, ramen, and more. It’s also ridiculously easy to make, requiring just a few simple ingredients.
Katsu is a dish that holds a lot of memories for me. There wasn’t much diverse cuisine in the town where I grew up, but every summer we’d road trip to San Diego to visit my grandparents. Whenever we made that drive, I looked forward to stopping for a chicken katsu lunch plate at my family’s favorite Hawaiian barbecue joint. Since going vegan, I whip up a batch of crispy tofu katsu any time I’m feeling nostalgic for that time.
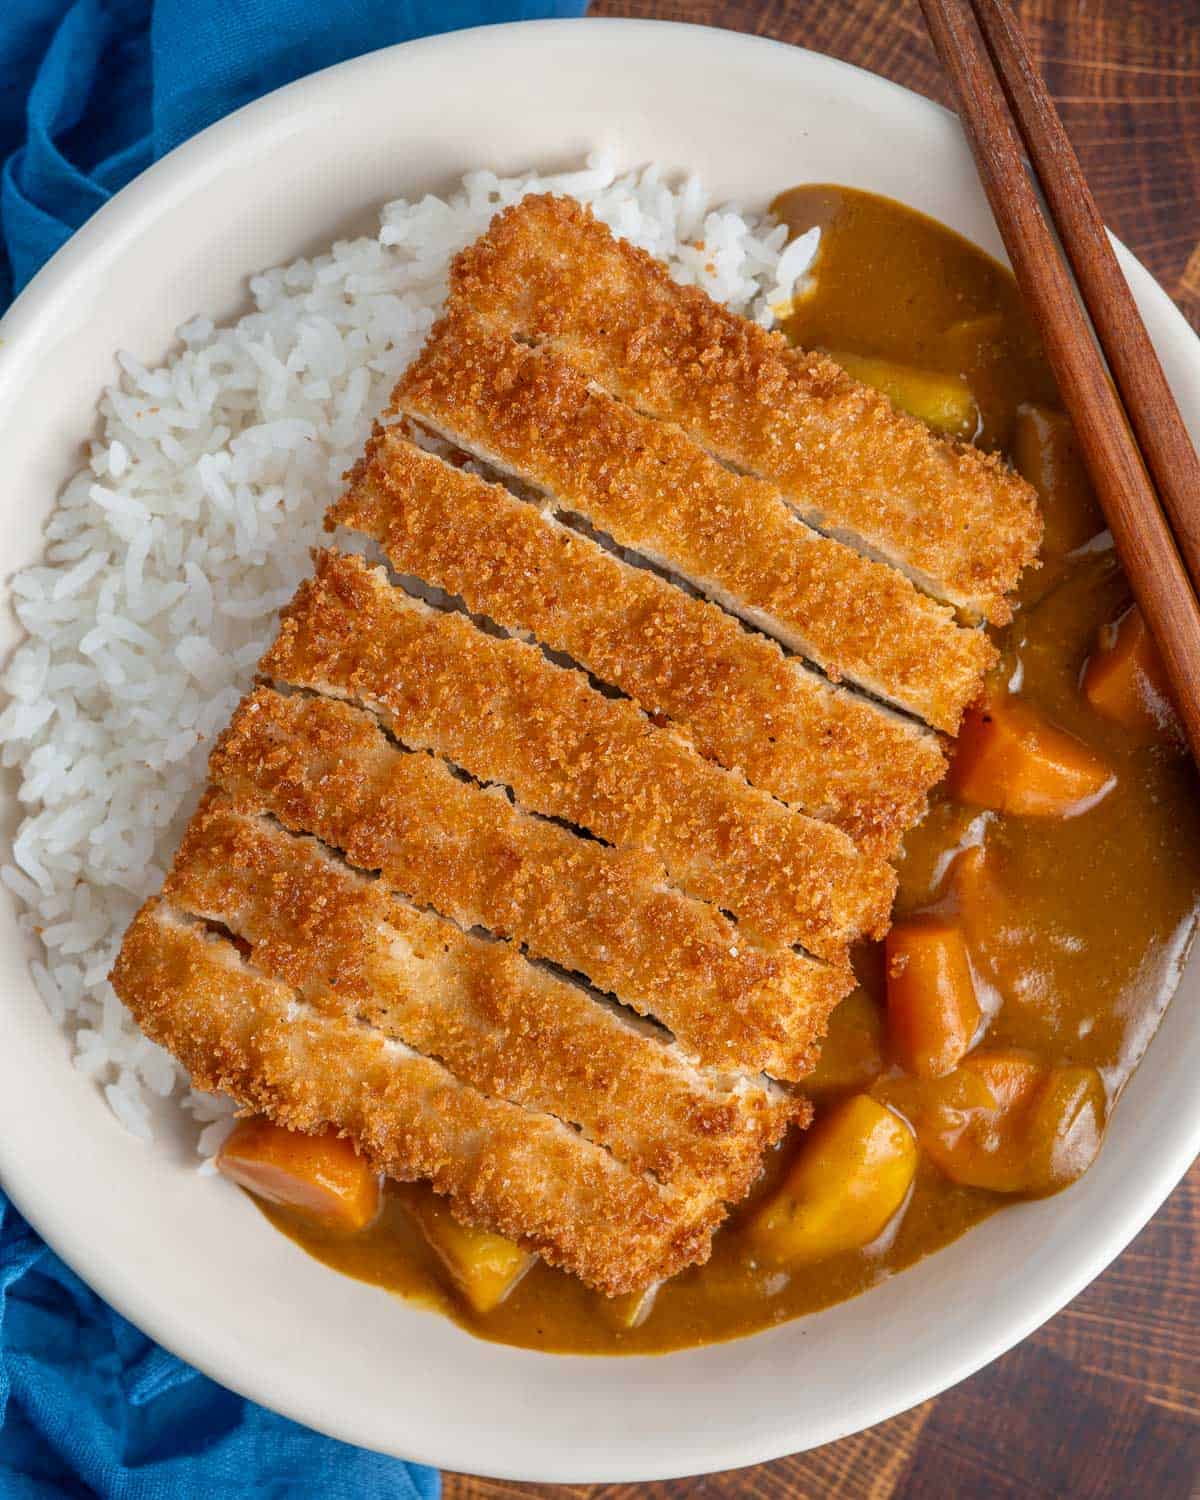
Table of Contents
This Crispy Tofu Katsu is…
- Vegan-friendly. Instead of the traditional pork, chicken, or beef, this recipe utilizes tofu. The egg is also omitted from the breading.
- Simple. You only need to use a select handful of ingredients to make a fantastic centerpiece for your meal.
- Easy to make. Frying oftentimes intimidates home cooks, but don’t worry! It’s actually quite easy, and I’ll share all my best tips and tricks to make it go as seamlessly as possible.
Ingredients for Vegan Tofu Katsu

- Tofu. Firm or extra-firm tofu works best in this recipe. For an extra-meaty texture, trying freezing and defrosting the tofu in the container ahead of time.
- Flour. Just a little, to dredge our tofu.
- Panko breadcrumbs. These Japanese breadcrumbs are known for their light, airy texture. They get extra golden brown and crispy when fried, making them a perfect choice for our tofu katsu curry.
- Cornstarch. Instead of egg, we’re using a combination of cornstarch, flour and water to adhere the breadcrumbs to the tofu. The cornstarch keeps the breading extra light and crispy.
- Oil. Use one with a high smoke point, such as vegetable oil, canola oil, or peanut oil (if you’re feeling fancy).
How to Make This Tofu Katsu Recipe
Step 1 (Optional) – Freeze & defrost the tofu. For a meatier texture, freeze and defrost your tofu a day or two ahead of time. Drain the block of tofu and transfer it to a sealable container. Place it in the freezer and allow it to freeze completely. Let it defrost overnight in the fridge or on the counter, or even pop it in the microwave to defrost quickly.
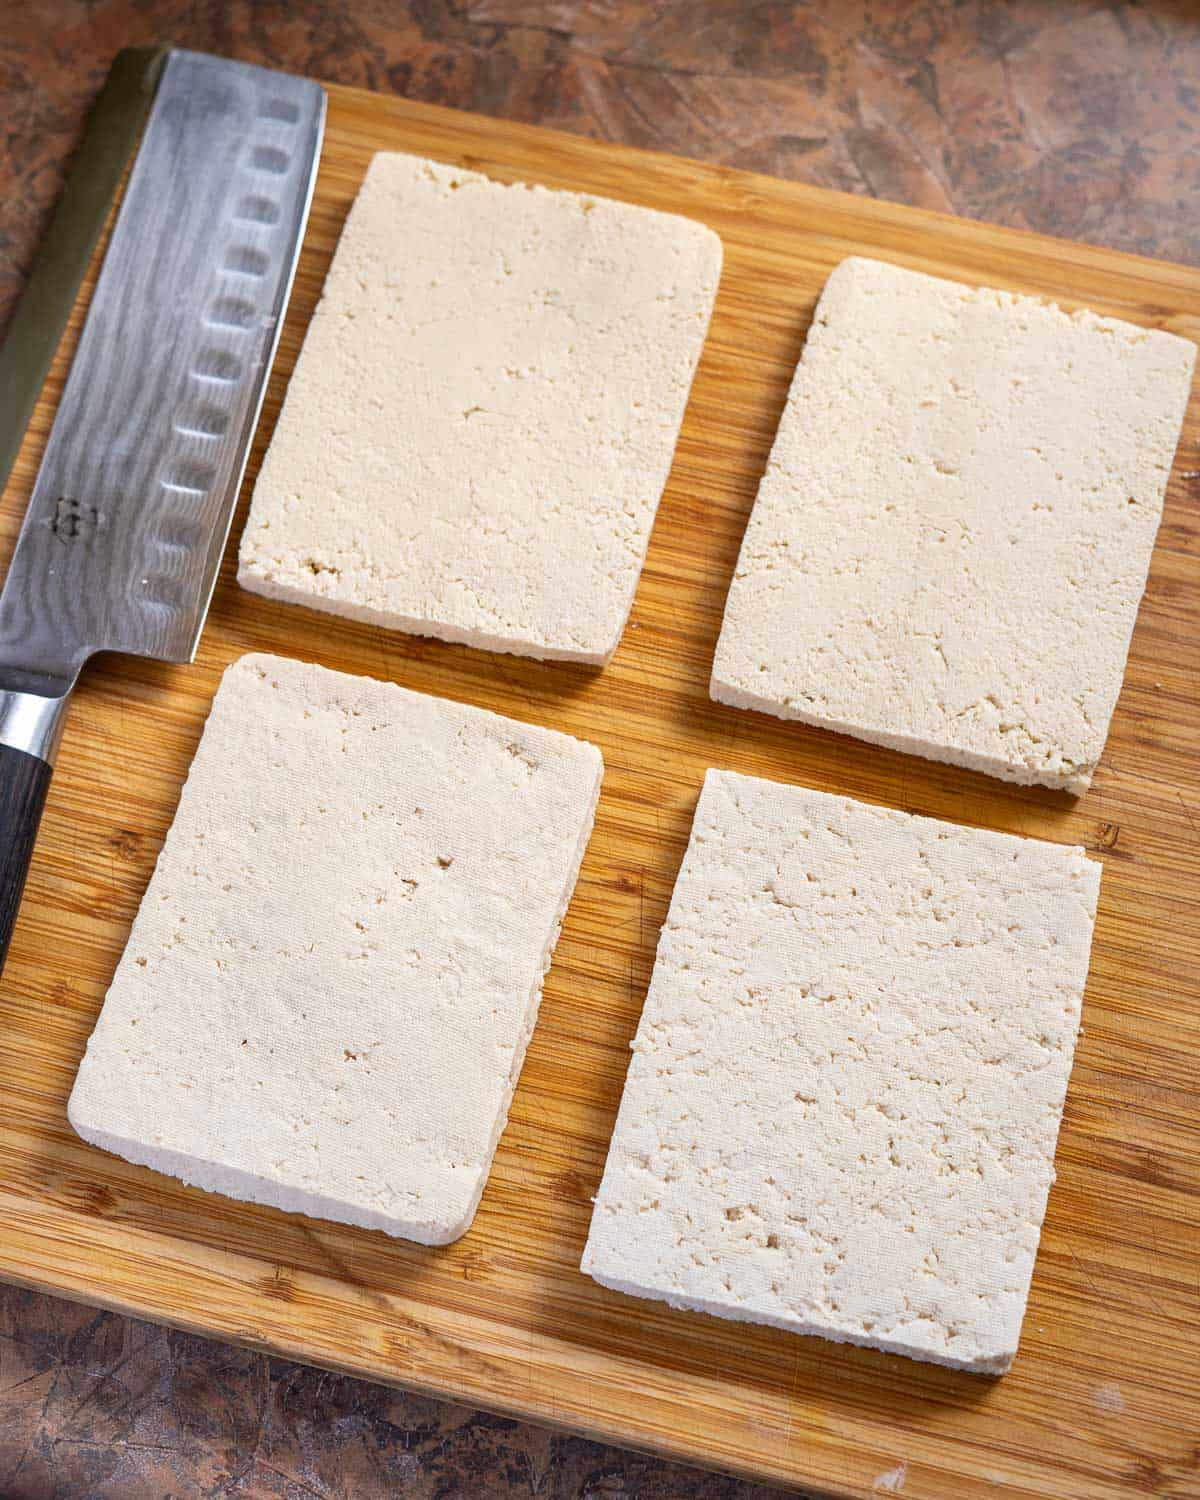
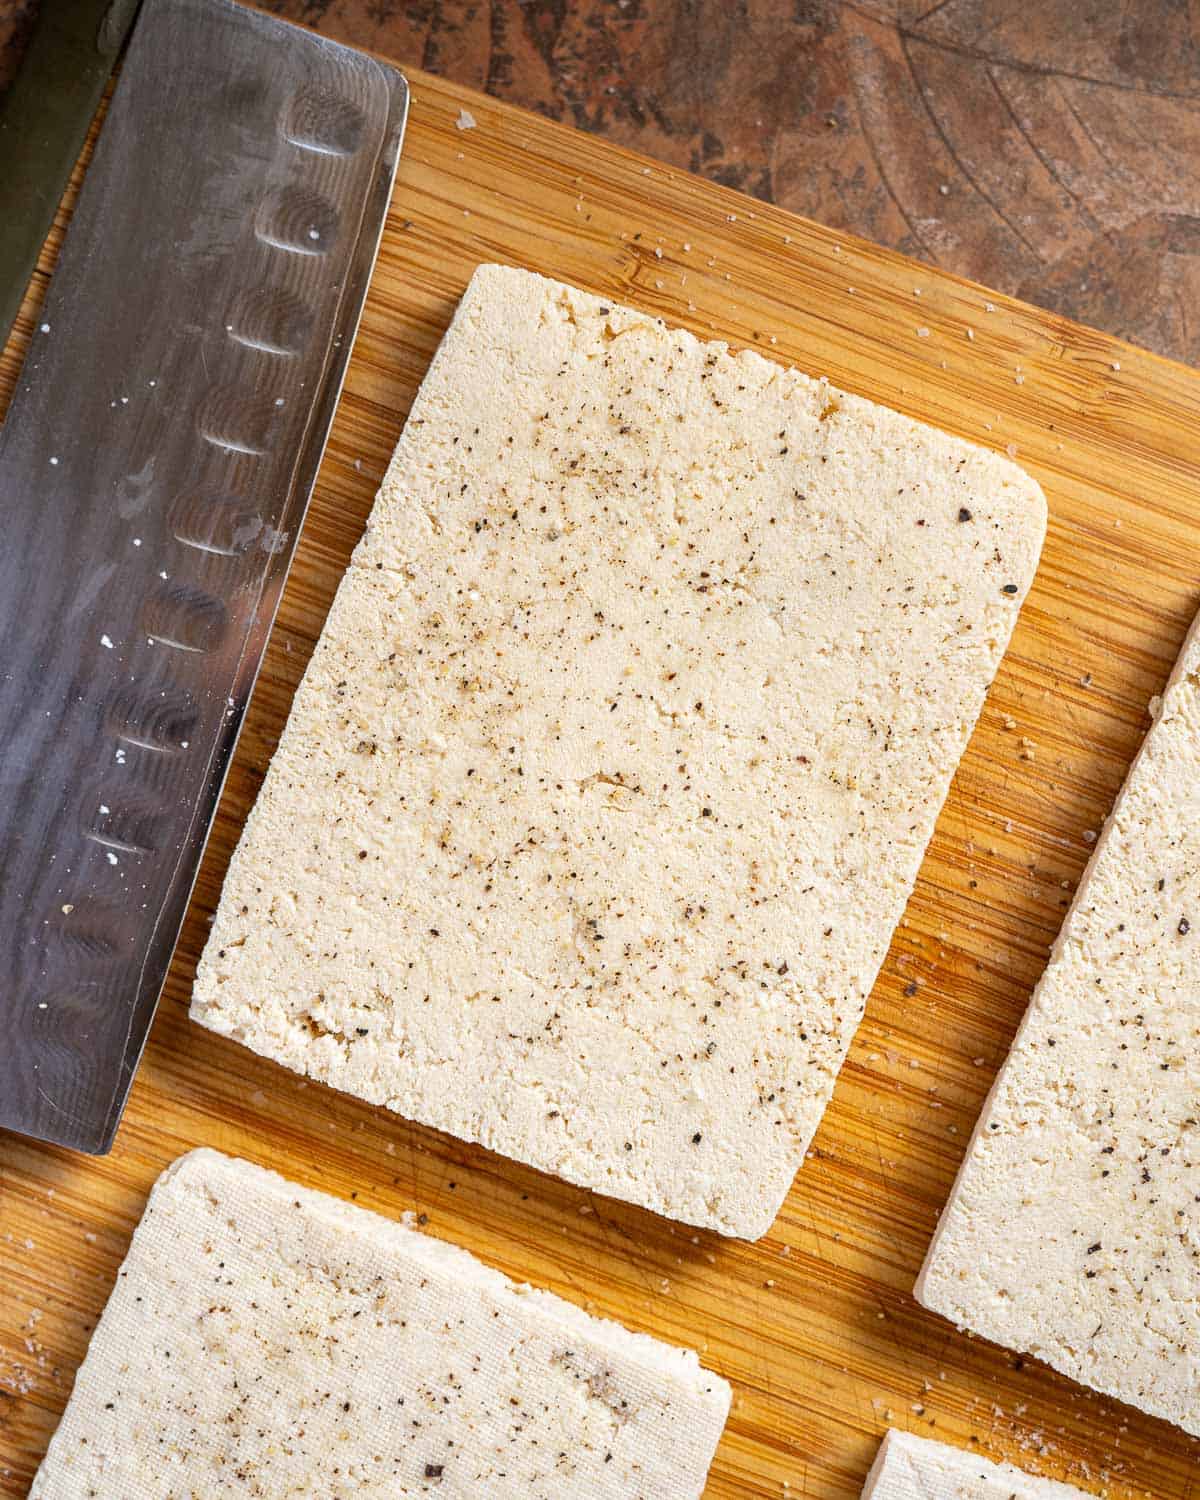
Step 2 – Cut and season your tofu. Cut open the defrosted tofu and drain the excess water. Use your hands to gently press out the excess liquid. Slice your tofu up into 6-8 “steaks,” roughly 1/2″ thick. (If you didn’t freeze and defrost the tofu ahead of time, you will want to use your favorite method to press your tofu now, then cut it into steaks.)
Step 3 – Set up the breading station. Create a 3-part breading station using 3 wide, shallow dishes.
- Dish 1 – Whisk together flour and a pinch of salt.
- Dish 2 – Whisk together flour, cornstarch, and water.
- Dish 3 – Add panko breadcrumbs.
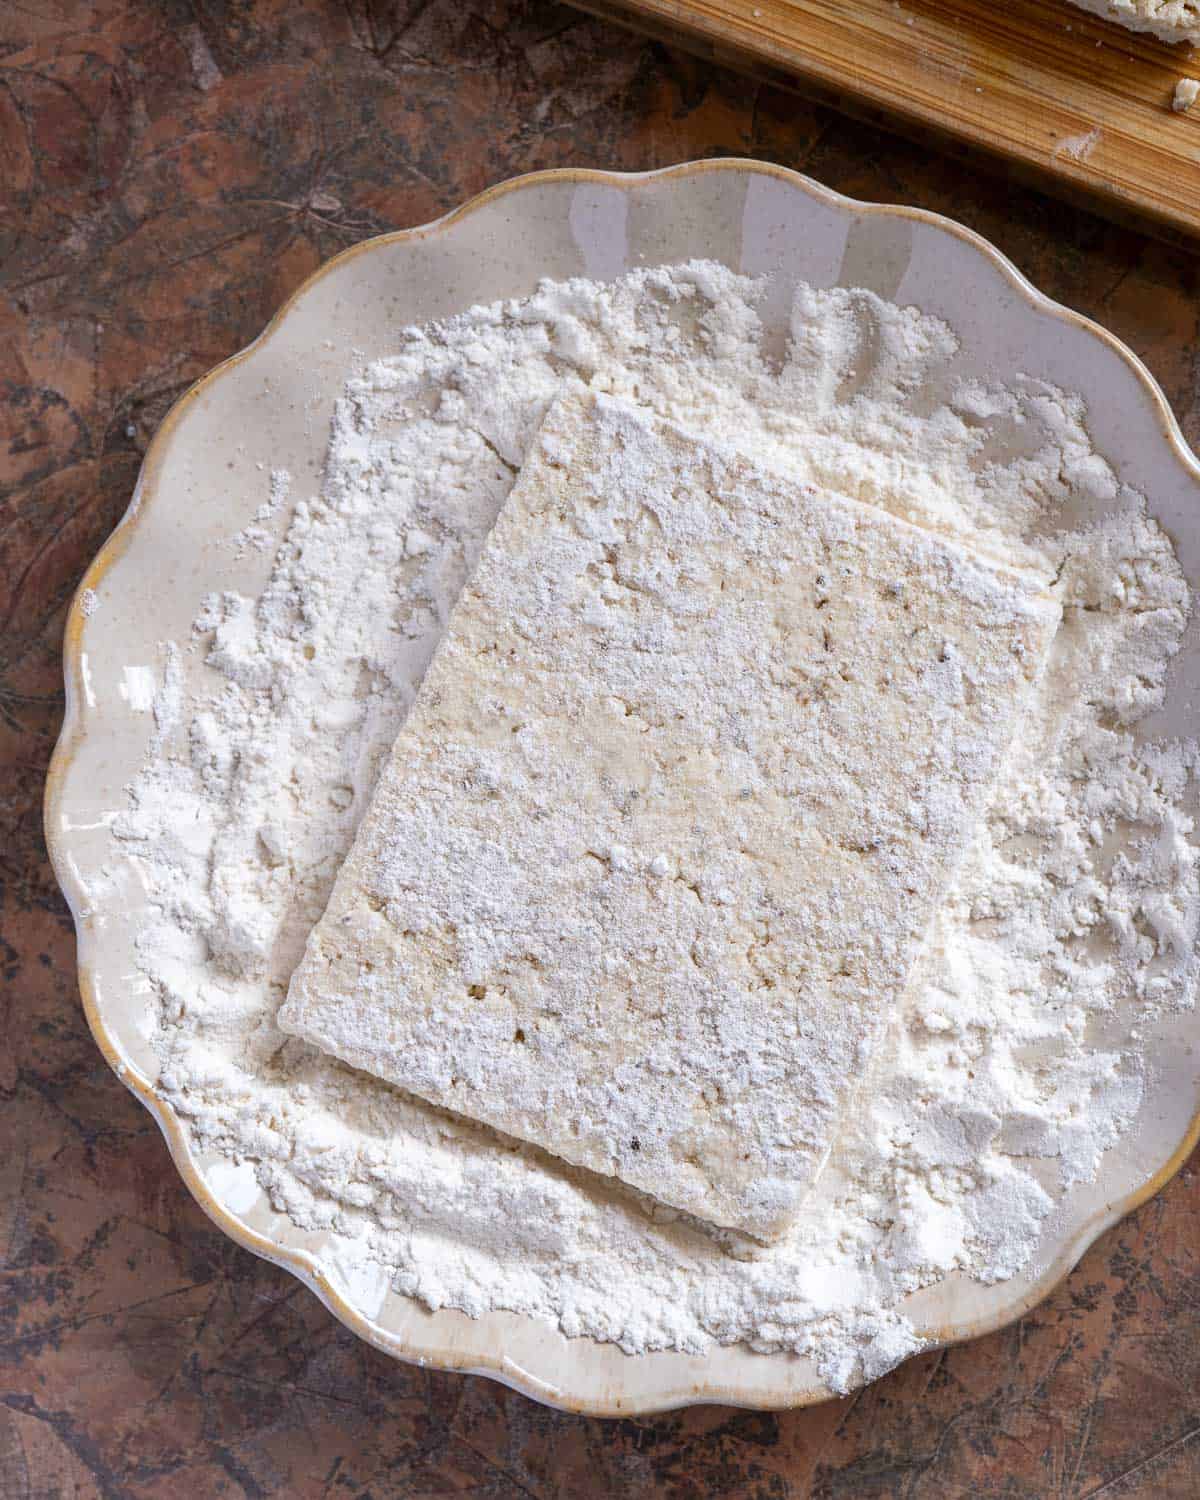
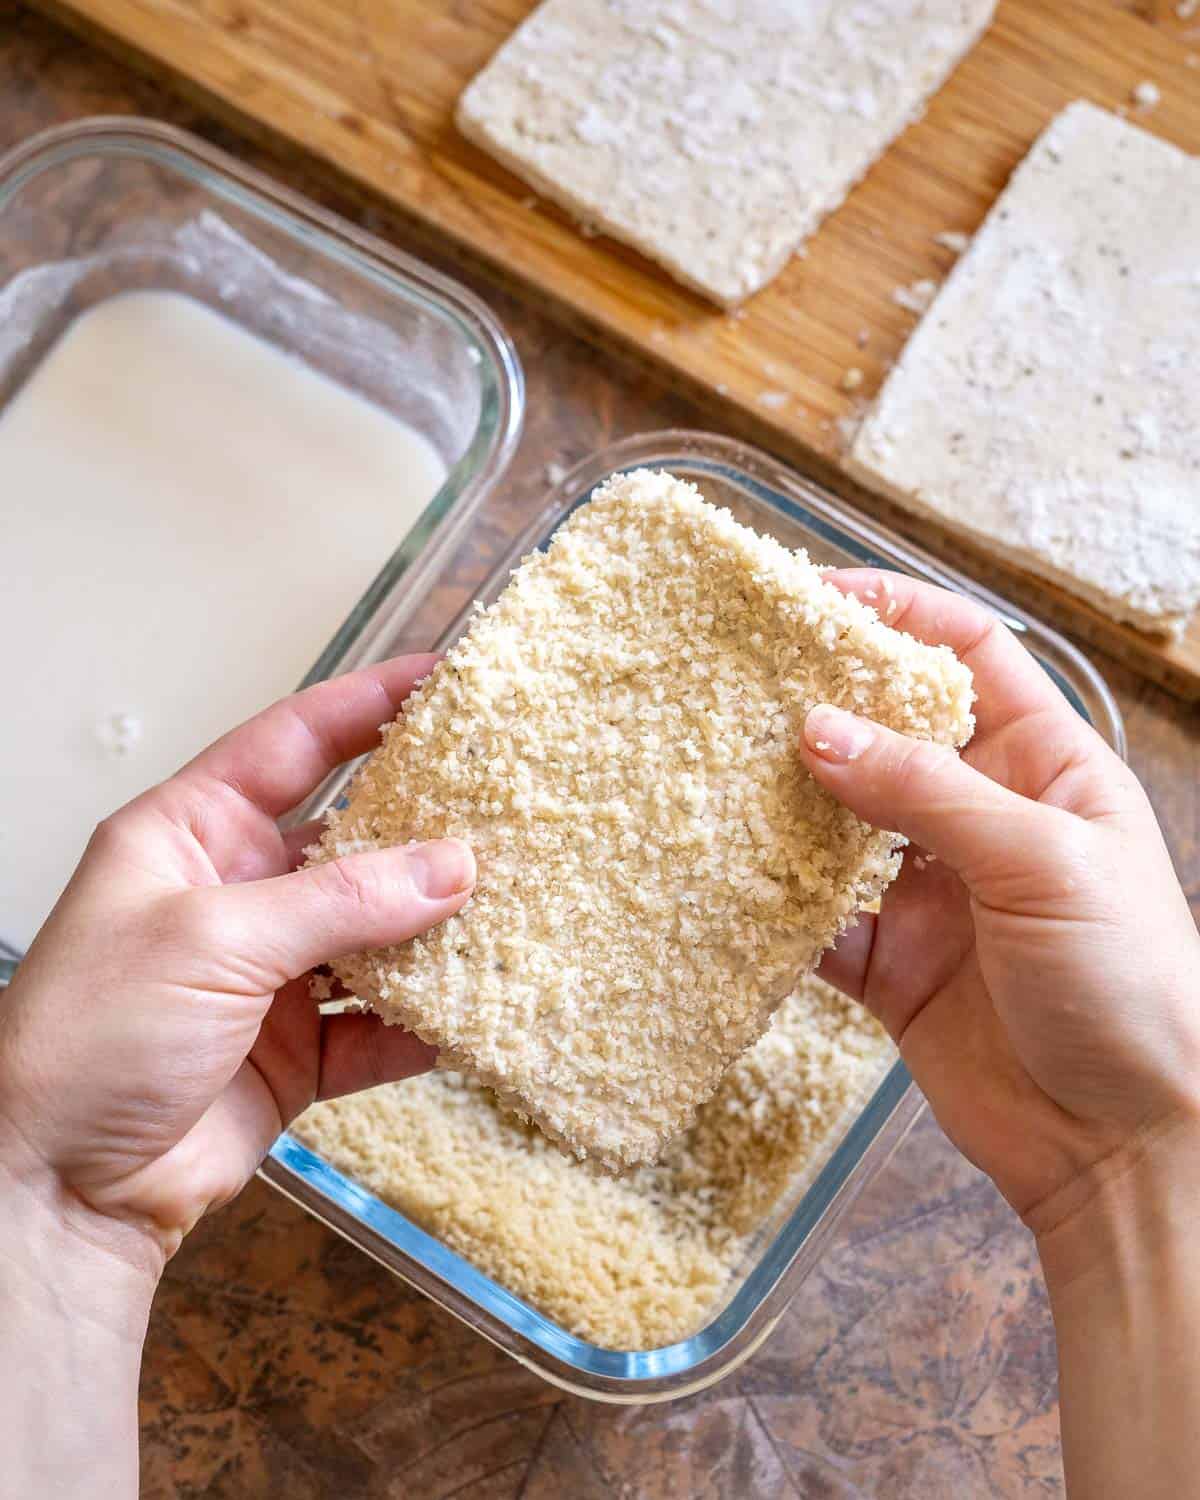
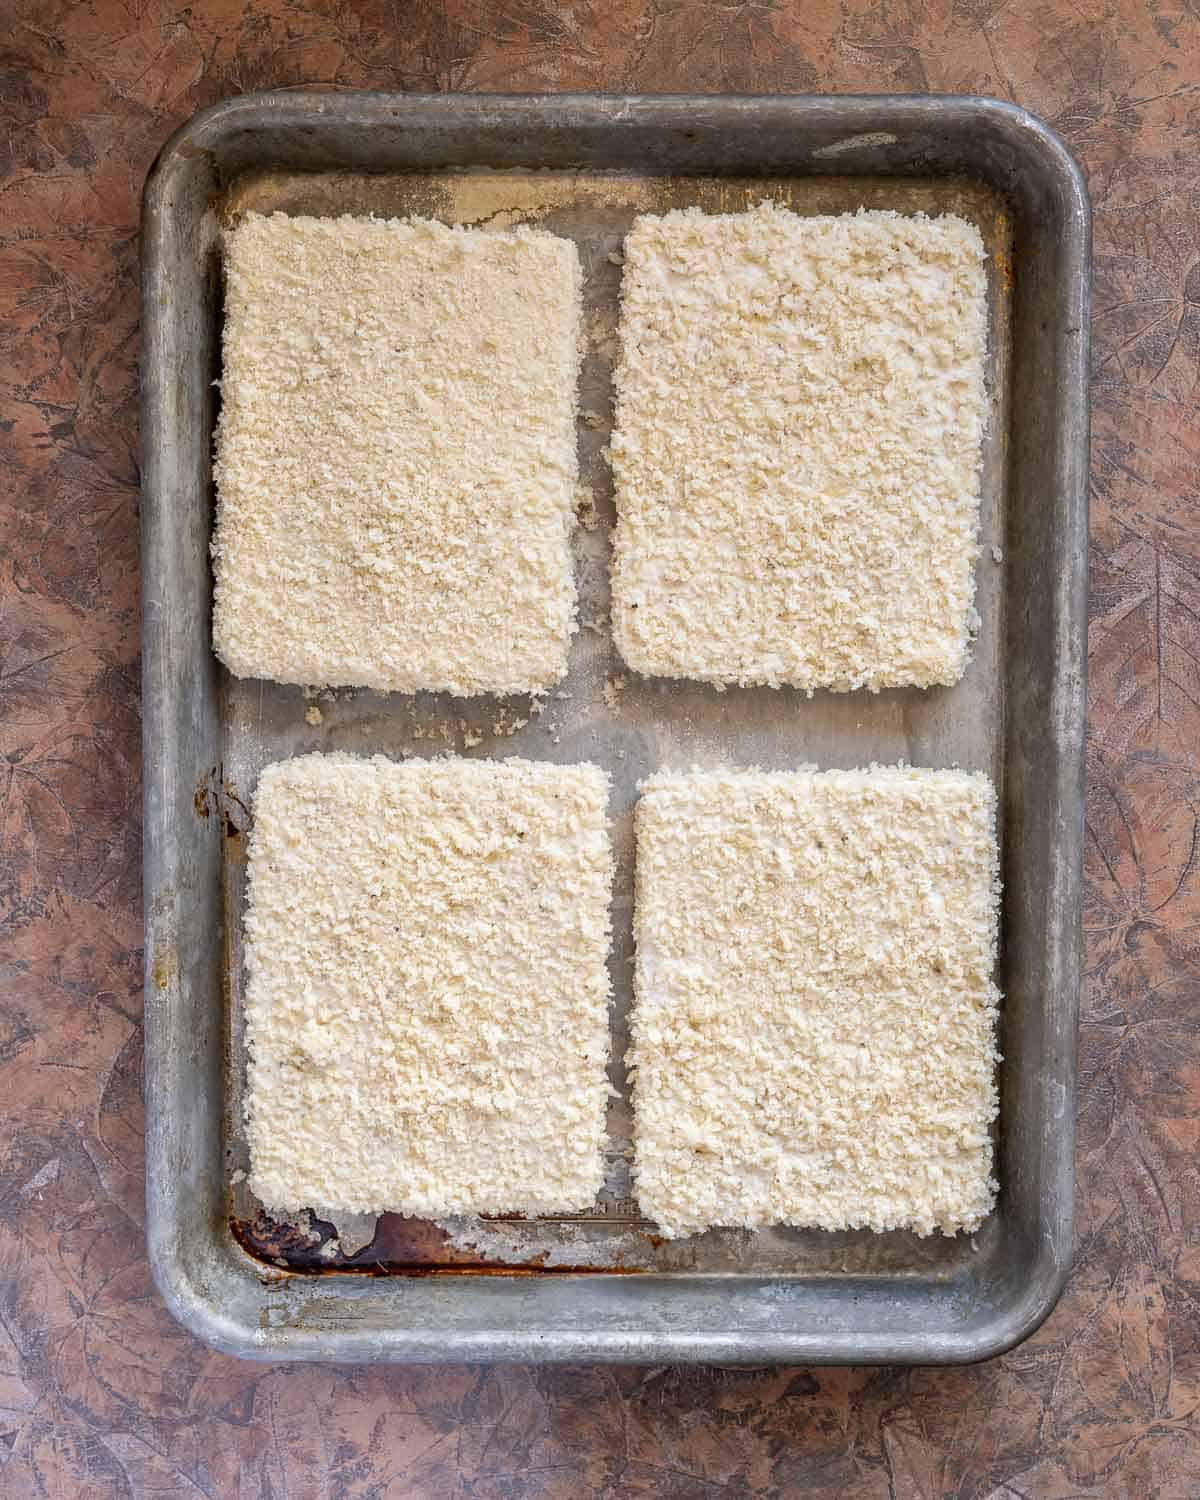
Step 4 – Bread the tofu. Dredge each tofu cutlet with flour, shaking excess off. Then dip in the cornstarch mixture, followed by the panko mixture. Set breaded tofu aside on a baking tray or plate.
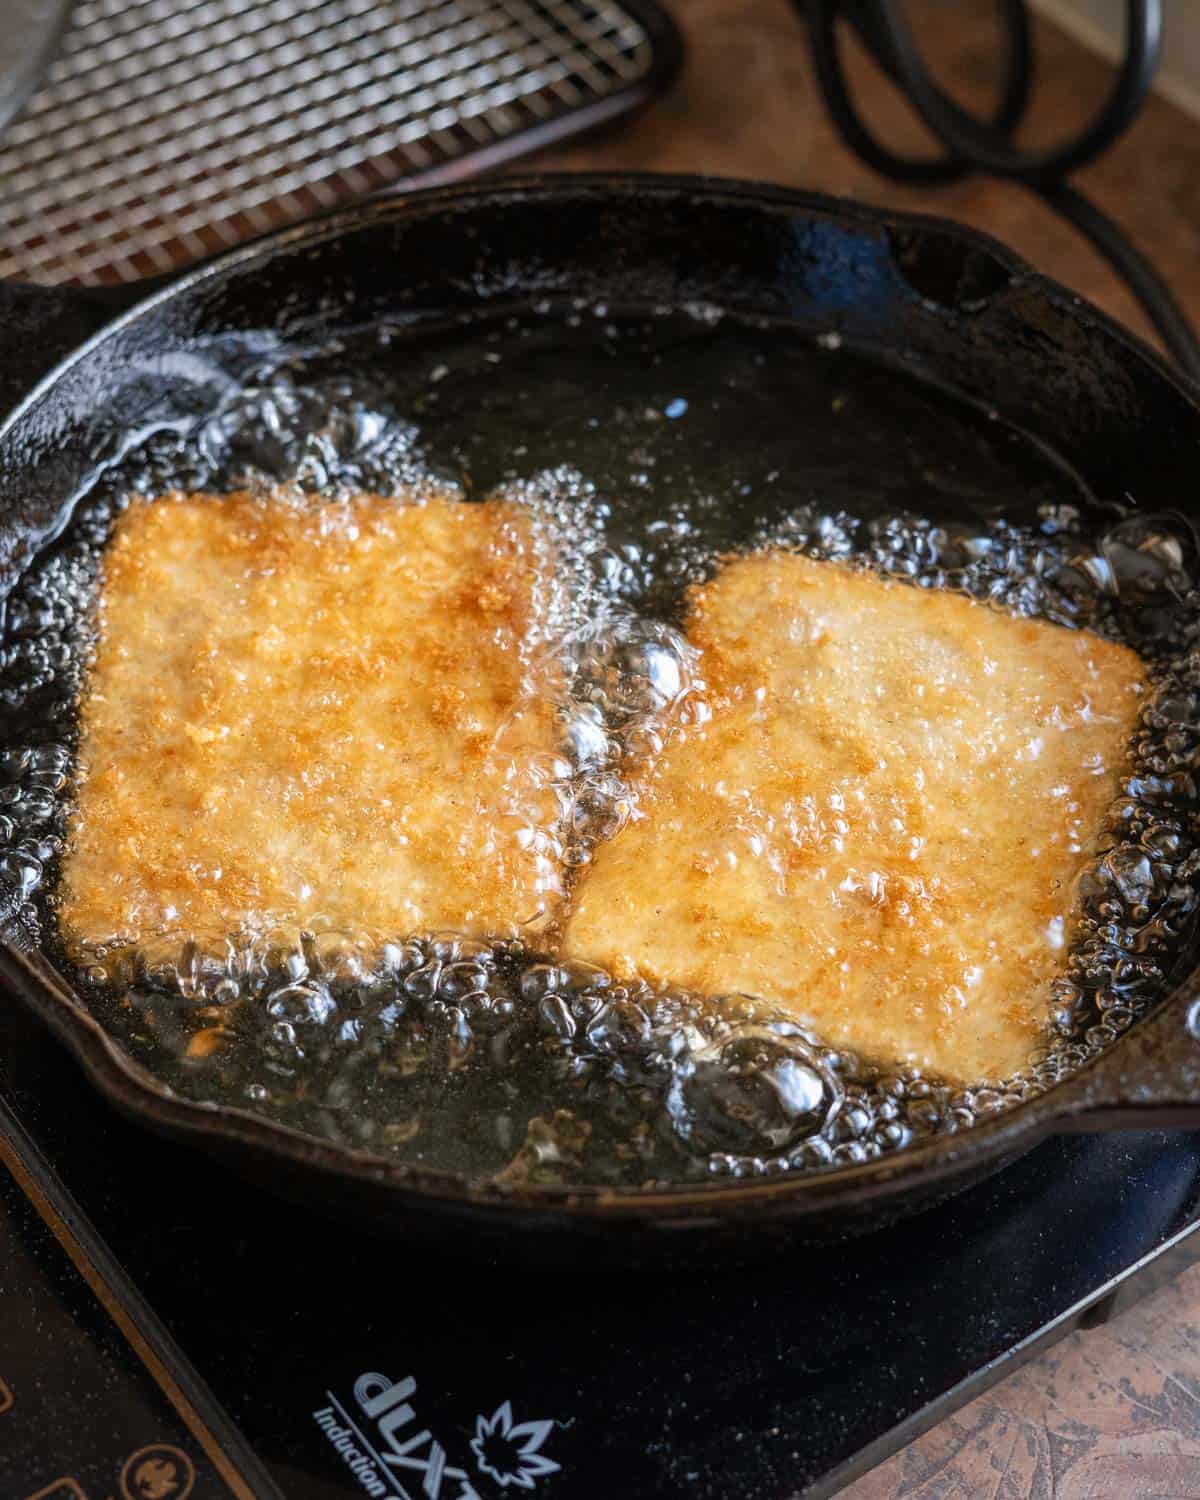
Step 5 – Fry the tofu. Tofu katsu can be deep-fried or shallow-fried. To shallow-fry, add about 1/2″ of oil to a skillet. (Make sure the pan is deep enough to keep any oil spattering contained). Heat the oil over medium-high heat until it reaches 360-375°F (a frying thermometer is a useful tool here). Gently drop in your tofu cutlets, making sure not to over-crowd the pan. Cook for a few minutes (until golden brown) and then flip and repeat. Transfer your freshly fried cutlets to a wire rack to allow excess oil to drip off.
Sarah’s Recipe Notes
- Make it meatier. If you’ve never tried freezing and defrosting your tofu before cooking it, definitely give it a try for this Tofu Katsu! The process transforms the texture of the tofu, making it a bit more spongey and similar to chicken. This takes a little extra planning, but it’s worth it!
- Fry with a thermometer. Are you new to frying? Using a thermometer can be quite helpful to ensure your oil is at the right temperature (between 360-375°F). If your oil is too hot, your breading might get a little too dark too fast. If it’s too cool, it’ll cook too slowly, causing the breading to retain a lot of extra oil. Cooked at the right temperature, the tofu katsu should be crispy and not greasy.
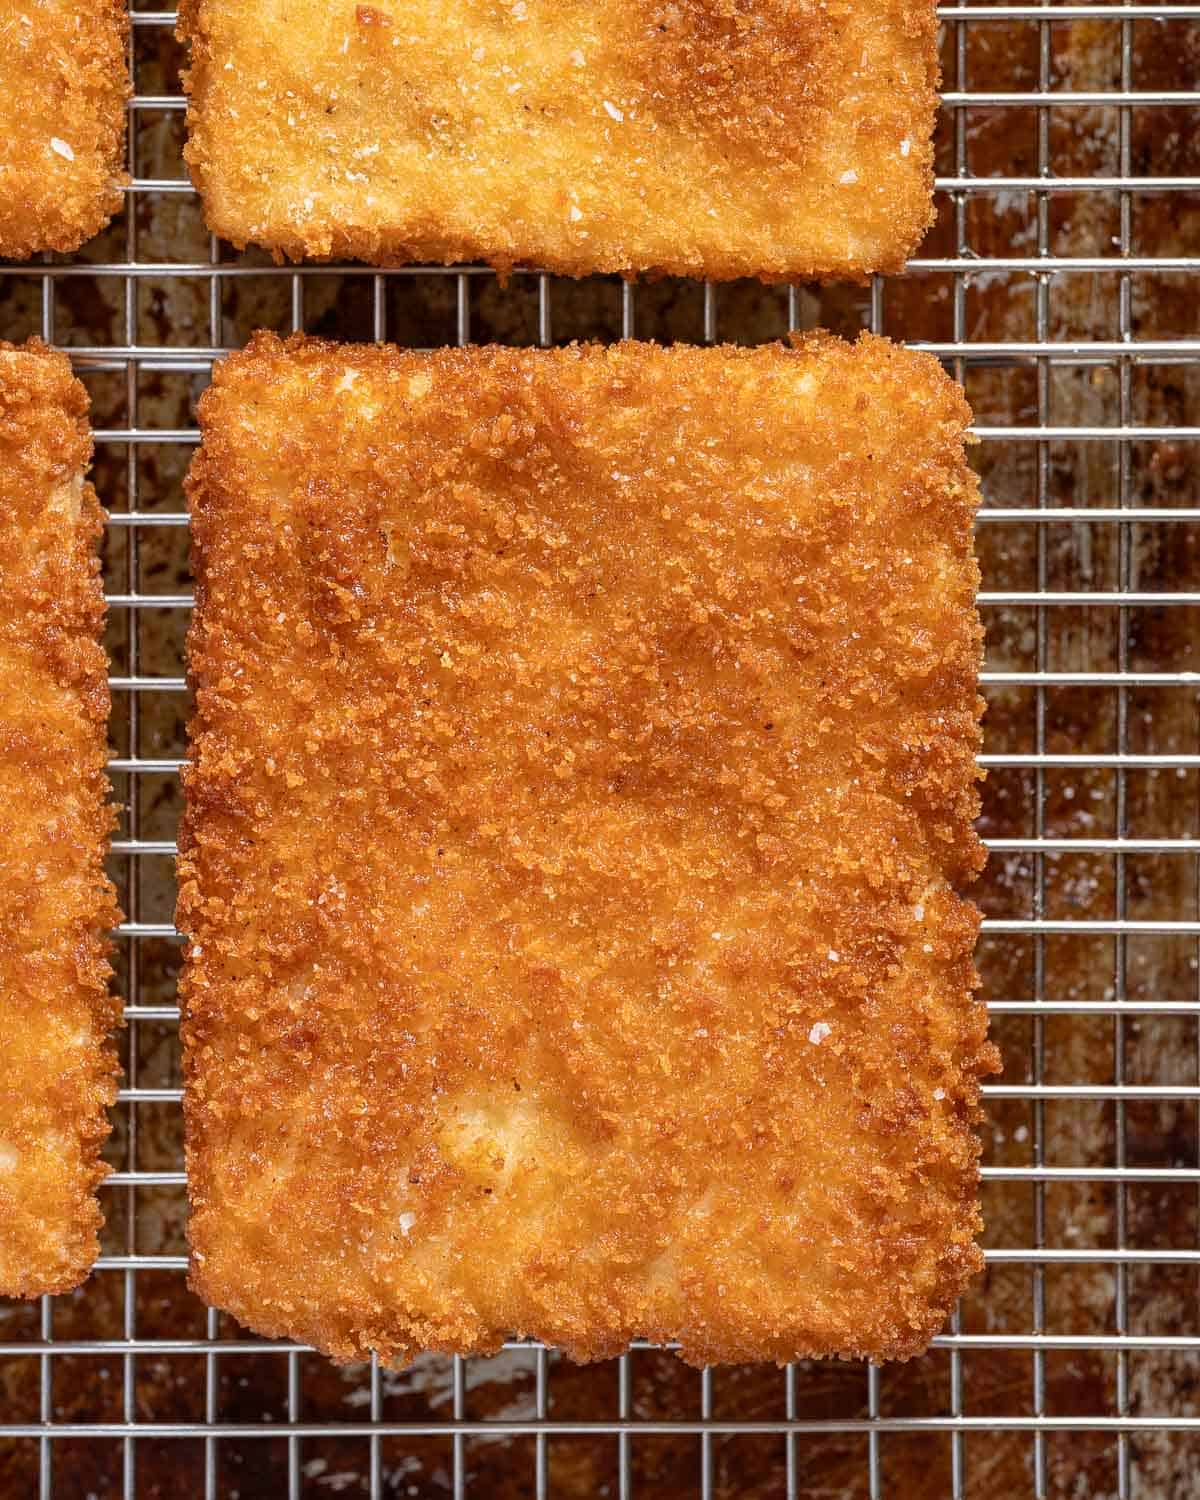
- Use a wire rack. When frying, I used to transfer my food to a paper towel-lined plate. Eventually I learned that this isn’t ideal, because it traps excess grease and steam close to the food, so it’s more greasy and less crispy. If you have a wire cooling rack handy, place it over a baking tray and use that instead. The rack allows the extra oil to drip off, and also allows the steam from the just-fried tofu katsu to dissipate without making the breading soggy.
- Frying safety tip! Frying things can be a little intimidating. One important tip is to place the tofu cutlets into the oil falling *away* from you, so the oil doesn’t splash toward you.
Serving Suggestions
Once you’ve made your delicious tofu katsu, you’re going to have to figure out what to serve it with! Here are some of our suggestions:
- Over rice with tonkatsu sauce. This is one classic way to enjoy katsu. Just whip up a batch of fresh rice, lay your tofu cutlets on top, and drizzle on some tonkatsu sauce. Top with some sliced scallions. We also love the Japanese barbecue sauce by Bachan’s!
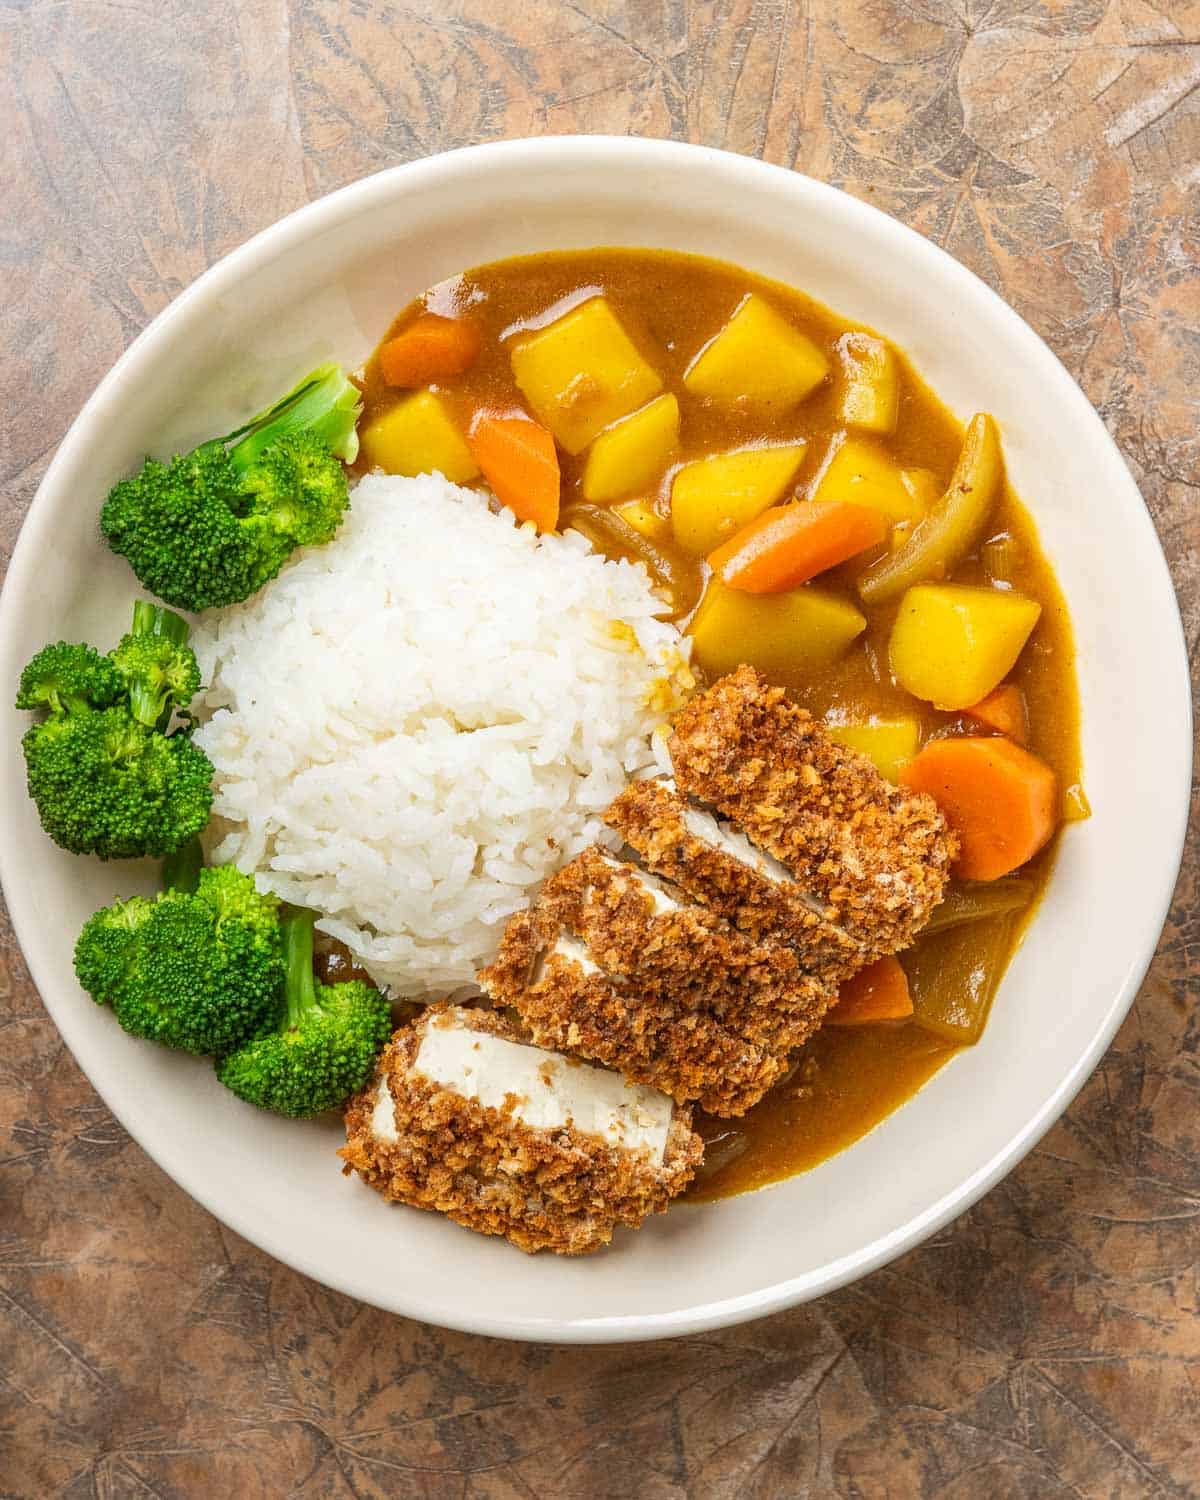
- With Japanese curry. This is one of our favorite ways to eat tofu katsu during the colder months when we’re craving heartier dinners. Japanese curry is a thick, savory stew filled with delicious veggies. It goes perfectly with these crispy tofu katsu cutlets.
- With Hawaiian macaroni salad. This combo is a summertime favorite of mine. Growing up, I used to love ordering chicken katsu from Hawaiian barbecue joints like L&L or Ono. Their lunch plates used to come with a heaping scoop of Hawaiian macaroni salad. When I feel like basking in my nostalgia, I whip up a batch of that salad to enjoy with my tofu katsu.
Frequently Asked Questions
Yes, absolutely! Substitute your favorite gluten-free flour for the dredge. Then you’ll simply need to find a gluten-free panko breadcrumb alternative. Check your local Asian market or your regular grocery store in the international section — look for Kikkoman Gluten Free Panko or Dynasty Gluten Free Rice Panko.
I’ve also heard from a few people that they simply crush up toasted rice cereal to use as a gluten-free panko substitute, though I haven’t personally tried this! Let me know if you do!
Yes, although I think the texture is crispier and less dry when fried. If you want to bake it, here are a few tips:
– Panko doesn’t brown as nicely when baked, so I actually like to toast the panko before breading my tofu with it. Add the panko along with 1 tablespoon of oil into a skillet. Toast it over medium-heat, stirring constantly, until an even golden brown color is achieved. Allow the panko to cool before using it to bread the tofu.
– Spraying or lightly brushing the breaded tofu with oil will also help to it to brown nicely and crisp up in the oven. If you’re going for a completely oil-free tofu katsu, you can skip this, but the breading will be quite pale when it comes out of the oven.
– Bake the breaded tofu in a 400°F oven for 20-25 minutes.
– Refrigerator: Leftover tofu katsu can be stored in the refrigerator in an airtight container for up to 5 days.
– Freezer: Stored in an airtight container, leftover tofu katsu can be frozen for up to 1 month. Defrost in the fridge overnight, or for a few hours on the counter. The texture of the tofu will change slightly (unless you already used the freeze & defrost trick).
– Reheating: Leftover tofu katsu will need to be crisped back up. The best way to do this is in the oven or in an air fryer. 10 minutes at 350°F usually does the trick. If you microwave it, the breading will definitely turn out soggy.
More Tofu Recipes
- Gochujang Tofu – Crispy tofu chunks tossed in a spicy, Korean-inspired gochujang sauce.
- Chili Garlic Silken Tofu – Skeptical of silken tofu? This 10 minute recipe will make you a believer!
- Marry Me Tofu – Pan-fried tofu steaks in a creamy, rich sun-dried tomato sauce.

Crispy Tofu Katsu
Video
Ingredients
- 2-4 cups vegetable oil see notes
- 1 (14 oz) block firm or extra-firm tofu
- salt and pepper
- 1/3 cup all-purpose flour to dredge the tofu
- 2 tablespoons all-purpose flour for the batter
- 2 tablespoons cornstarch
- 1/3 cup water
- 1 cup panko breadcrumbs (start with 1/2 cup and add more as needed)
Instructions
- Optional but recommended: A day or two of time, freeze the tofu in the package. Allow it to defrost completely (in the fridge overnight, or on the counter).
- Drain the tofu and use your favorite method to press out the excess liquid. (If you used the freeze + defrost trick, you can simply press out the extra liquid gently by hand.)
- Cut the tofu into roughly 1/2 inch slices. Any shape will work, but I like to cut along the long edge to get about 6-8 "cutlets."
- Season each tofu cutlet with salt and pepper.
Bread the Tofu
- Then set up a 3-part breading station.Dish 1: Add 1/3 cup all-purpose flour.Dish 2: Whisk together 2 tablespoons all-purpose flour, 2 tablespoon cornstarch, and 1/3 cup water to form a very thin batter.Dish 3: Add panko breadcrumbs. You might not need the full cup. Start with 1/2 cup and add more as needed.
- Dredge each tofu cutlet in flour. Shake off excess. Then dip in the flour and cornstarch slurry. Allow excess to drip off. Lastly, coat with the panko crumbs.
Fry the Tofu
- Place a wire cooling rack over a baking tray so that the excess oil can drip off of your tofu katsu once it's done frying. (If you don't have one, you can line a plate with paper towels instead.)
- Heat about 1/2 – 1" of vegetable oil to about 375°F in a heavy-bottomed skillet or pot. (Use a Dutch oven or a skillet with higher sides if you want to avoid the splatter.) It is helpful to use a thermometer to ensure the tofu katsu cooks properly and doesn't turn out greasy.
- Place the breaded tofu cutlets in the preheated oil and fry 3-5 minutes per side, until deep golden brown. Avoid over-crowding the pot, as this can lower the temperature of the oil and make it take much longer to cook, resulting in greasy katsu.
- When golden brown, remove the tofu katsu to your prepared wire rack (or paper towel lined plate). Sprinkle with salt to finish.
Storage and Reheating
- Refrigerator: Leftover tofu katsu can be stored in the refrigerator for up to 5 days.
- Freezer: It can be frozen in an airtight container for a month.
- Reheating: Tofu Katsu will need to be re-crisped in the oven, air fryer, or toaster oven. Generally 8-10 minutes at 350°F works well, but keep an eye on it to avoid it getting too dark. If you microwave it, it will be soggy.
Love this recipe! Super straight forward and delicious 🙂 I always felt intimidated by making katsu but this was super easy!! I had mine over rice with some veggies and the Japanese bbq sauce but can’t wait to make this katsu again with curry!
Lia, I did the same thing! I was in a time crunch so I served the tofu katsu with rice, veggies, and Japanese BBQ sauce and it was so good!
Pingback: Crispy Tofu Katsu – Tasty food on a Tiny Budget
i had some leftover japanese curry and half a block of pressed tofu and decided to make this recipe! i baked the tofu katsu and it still turned out crispy and delicious. i added some garlic powder when seasoning my tofu and it added some extra flavor. i can’t wait to make this again
Thank you for this recipe! I really enjoyed it and I will definitely make it again. The texture of the tofu and the breading both were amazing 🙂
This was phenomenal!!!! Alongside rice and Hawaiian macaroni salad. Soooo good! I will definitely be serving this to people who don’t think plant based food alternatives can taste just as good!!!
OMG!!! This was amazing. My husband said the crispiness of this tofu is what makes it. I also made a japanese curry from scratch from chat gpt and it was a slam dunk. Thanks so much Sarah!
Love to hear that! For future reference, we also have a Japanese Curry recipe on the blog. 🙂
Delicious!!! We paired it with golden curry with veggies over rice topped with kewpie and green onions. Haven’t prepared tofu this delicious before, still thinking of that meal.
This recipe is amazing. The tofu comes out chewy and not mushy at all and the breading is super crispy and crunchy. 10/10 – would recommend!
This Crispy Tofu Katsu recipe looks absolutely delicious! I love how you’ve managed to make it both crispy and savory. I can’t wait to try it out this weekend. Thanks for sharing such an amazing vegan dish!
I’m so glad you enjoyed the recipe! It’s great to hear that the tofu turned out chewy with a perfectly crispy coating. Achieving that texture can sometimes be tricky, so I’m thrilled this one worked for you. Thank you for the 10/10 rating—definitely makes it worth sharing! Feel free to try other variations or let me know how it turns out if you add any personal twists.
I just tried the Crispy Tofu Katsu recipe, and it was absolutely amazing! The tofu came out perfectly crispy, and the sauce added such a delicious kick. I love how easy it was to make too. Thank you, Sarah, for sharing this delightful dish!
I could eat this every day, it’s SO good. I put the leftovers in the air fryer at 375 for 5 minutes and they crisped back up pretty nicely!
This recipe looks amazing! Do you have any tips for getting the panko coating extra crispy when air frying instead of deep frying? I’d love to make a healthier version!
My family loved this, we aren’t vegan or vegetarian but we do enjoy a lot of meatless meals together. My teenage daughter was kind of hesitant on trying this, but she realized she wasn’t going to find a surprise chicken tendon or a piece that grossed her out. Now she requests this at least once a week. I do add some additional seasonings to my flour and panko, such as garlic, onion and a little chicken bouillon. Also, I went ahead attempted Hawaiian Mac salad, totally worth it and easy to make. Thank you for sharing and I love your YouTube channel.
I tried the Crispy Tofu Katsu recipe and it was a hit! The texture was perfect, and the coating was so flavorful. I’ll definitely be making this again! Thanks, Sarah!
I just tried the Crispy Tofu Katsu recipe, and it was absolutely delicious! The texture was perfect, and the sauce added such a nice flavor. I loved how easy it was to prepare. Thanks for sharing this amazing recipe, Sarah! Can’t wait to make it again.
Very crispy, and very good. I’ve never really fried anything but it was pretty easy. Came out well!
I will definitely be making these again! I was nervous to try as I’ve never made Tofu Katsu before, but this recipe and the very detailed instructions made it so easy! I used the high protein super firm tofu from Trader Joe’s and barely had to press it. I served it with rice, tempura asparagus (to use up some of the remaining slurry and panko), and the CoCo vegetable curry that I brought home from Japan last year. It was perfect!
A serious classic we can’t live without! This recipe beats all of the others!
Great recipe, but your page has so many ads it’s absolutely unusable, extremely annoying and made me look elsewhere.
Outstanding! Crispy, vegan, served with tonkatsu sauce! I was shocked at how good and simple this was! Took a total of about 10 minutes to put dinner on the table! Used peanut oil rather than vegetable oil to get the higher temps. Wow!
very gooood!!
Perfect crisp and crunch, made this into a katsu sandwich – my non-vegan boyfriend loved it and requests it often. Going to make it again – also very easy to make with high pay off! Thanks Sarah for another great recipe!