
I find few things in this world more satisfying than making bread from scratch. There’s something therapeutic about this commitment to slow down, to measure and knead and shape with care. It’s a sweet and temporary respite from our fast-paced, convenience-driven modern world.
My last two years of college, I lived in a cooperative house where I baked bread almost every weekend –– usually around 10 to 12 loaves to serve as our residents’ bread supply for the week. Sadly, in the years since graduating and moving out on my own, I’ve only made homemade bread a handful of times.

At the time of writing, Eric and I have been under quarantine for just short of a month. While it’s been challenging in many ways, one silver lining is that it’s reignited my desire to experiment in the kitchen, especially with from-scratch staples. In the past two weeks I’ve made more loaves of bread than in all of the past few years combined, and I can’t say I’ll be going back to the store-bought stuff any time soon.
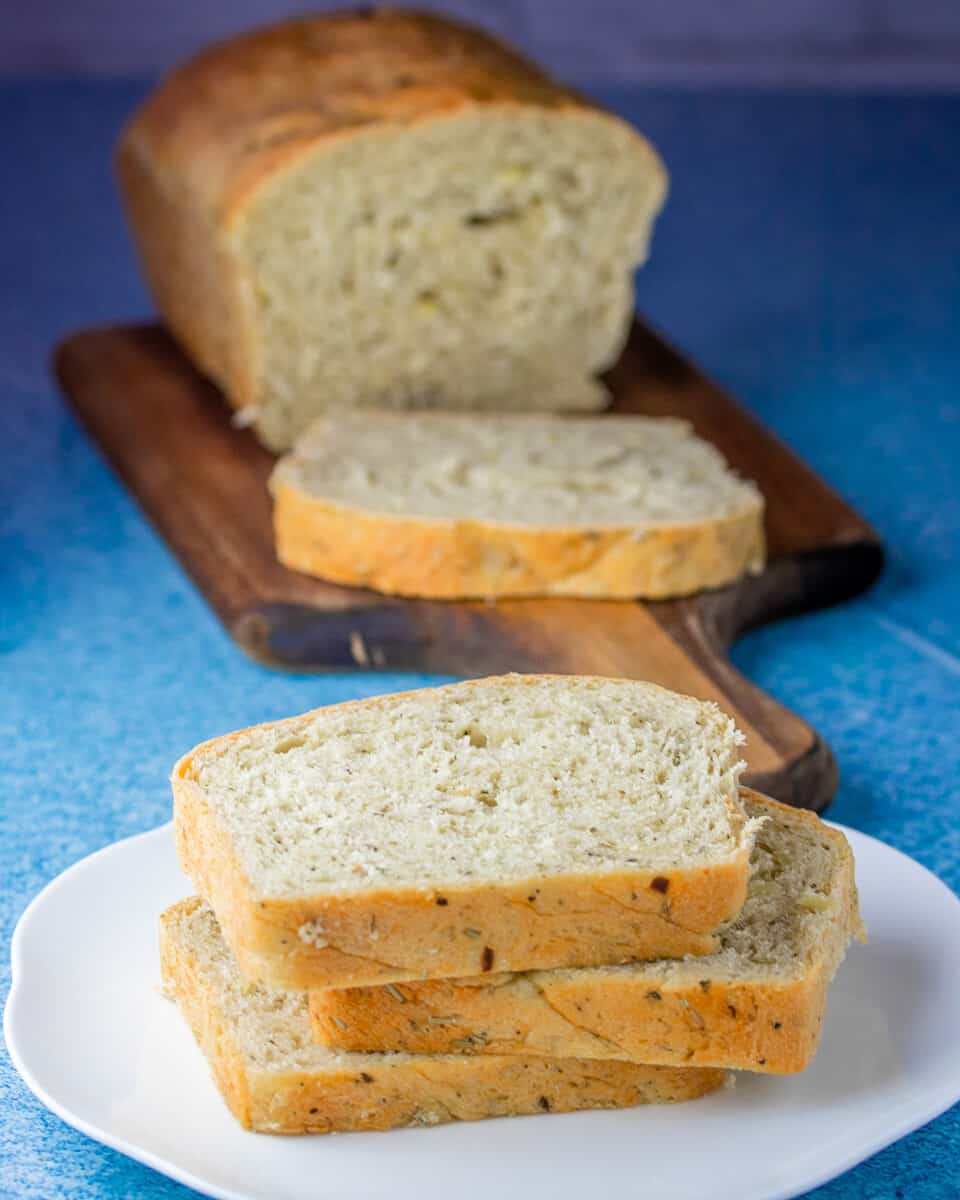
Homemade bread tastes fantastic, usually costs less than its store-bought counterparts, and can be customized in myriad ways. I used my basic white bread recipe as a basis for this garlic herb loaf. Having made a few no-knead loaves of bread in my Dutch oven, I wanted something softer and less crusty that could be sliced for sandwiches or my morning buttered toast.
Use this recipe as a template and feel free to get creative with your additions to the dough. You can add different herbs, diced onions, sundried tomatoes, chopped kalamata olives, or even grated vegan parmesan. In the not-too-distant future I’ll be sharing a few sweet variations on this white bread loaf.
As always, if you give this recipe a try, I would love to see your results! Upload a photo (or ten) to Instagram and tag me @sarahsvegankitchen_ . I do my best to see them all and share them on my story when I do! Happy baking!

Easy Garlic Herb Sandwich Loaf
Ingredients
- 3 cups all-purpose flour plus more for kneading
- 1 cup unsweetened plain plant milk
- 1 0.25 oz packet active dry yeast, or 2 scant teaspoons instant yeast
- 1 heaping teaspoon dried basil
- 1 heaping teaspoon dried oregano
- 1 tablespoon dried rosemary crushed
- 1 teaspoon onion powder
- 3-4 large cloves garlic minced; or 1 teaspoon garlic powder
- 2 teaspoons salt
- 1 tablespoon granulated sugar
- 3 tablespoons olive oil
Instructions
- Pour lukewarm milk into the bowl of a stand mixer (or a large mixing bowl if preparing by hand). Stir in sugar and sprinkle in yeast. Proof for 10 minutes to ensure that your yeast is alive. While your yeast proofs, whisk together all dry ingredients (including minced garlic) in a separate bowl.
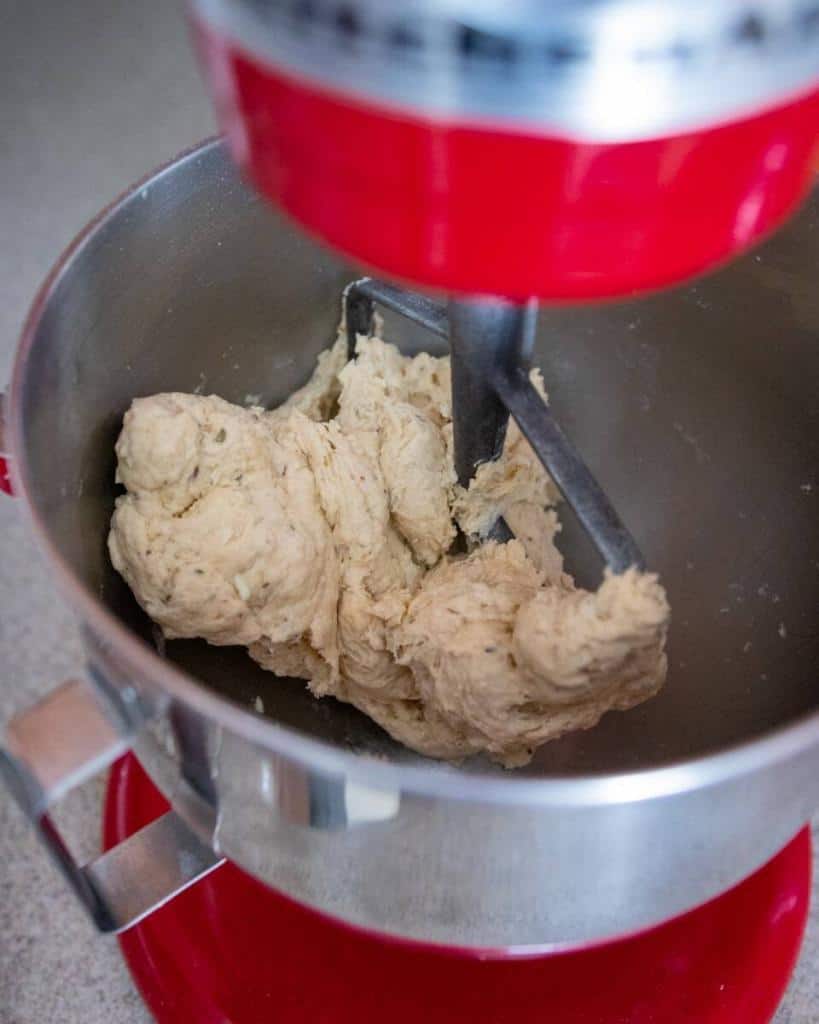
- Add olive oil into wet ingredients. Dump in dry ingredients. If preparing with a stand mixer, mix on medium speed with the paddle attachment until the dough comes together in one shaggy mass. If preparing by hand, just stir until all the ingredients are combined and there’s no dry flour left in the bowl.
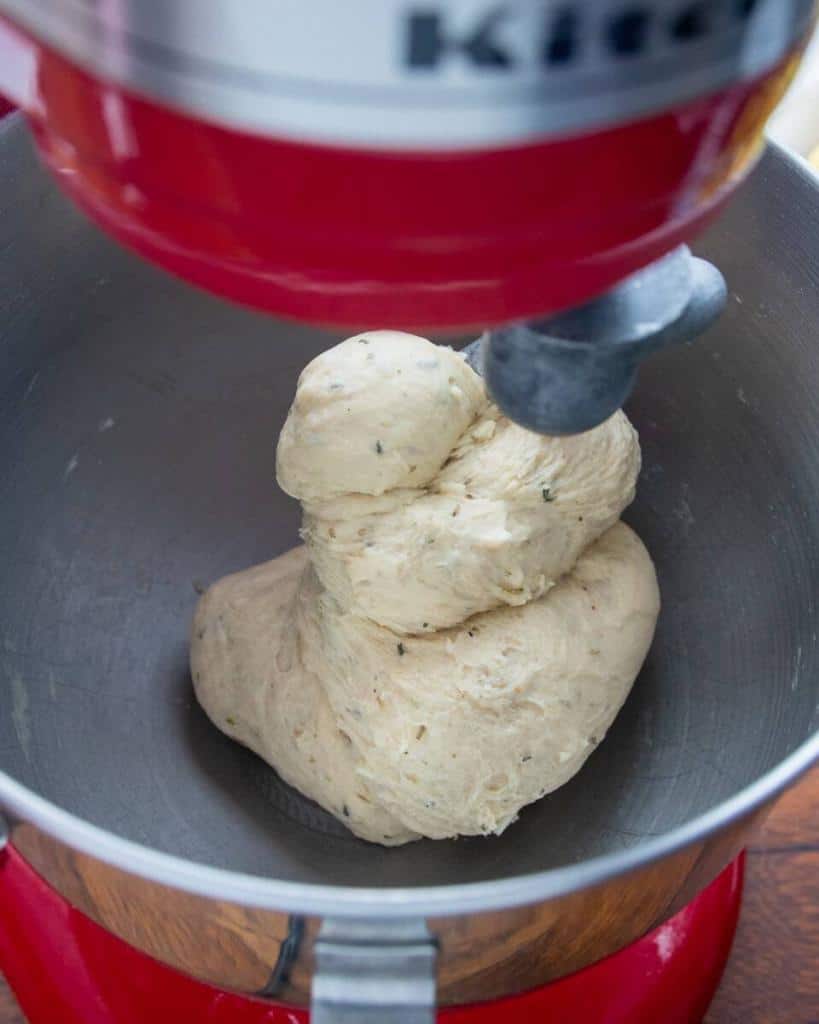
- If preparing with a stand mixer, switch to the dough hook attachment and knead at a medium speed for 5-8 minutes. The dough should be slightly tacky but still clear the sides of the bowl (see image). If it’s on the sticky side, add in extra flour a tablespoon at a time until the dough clears the sides of the bowl. If preparing by hand, knead on a lightly floured surface for about 10 minutes. Again, the dough should be slightly tacky but not so sticky that’s it’s difficult to handle. Knead in extra flour a tablespoon at a time until the dough no longer sticks to your fingers or your work surface.
- When you’re done kneading, the dough should be smooth and elastic, and should spring back when gently poked. Place your dough into a lightly oiled bowl and give it a flip so that there’s oil coating all surfaces of the dough. Cover with a damp towel or plastic wrap, place in a warm spot, and allow to rise until roughly doubled in size. (This should take between 1 and 2 hours depending on the temperature of your kitchen. In cold winter months, it might take the full two hours.)
- Turn risen dough out onto a lightly floured surface and flatten it into a rectangle, then roll into a log about 8″ long. Transfer to a lightly greased 9″x5″ loaf pan. Cover with plastic or a damp towel and allow to rise an additional 30 minutes to 1 hour, or until loaf has risen just about an inch past the height of the loaf pan. Near the end of the rising time, preheat oven to 350°F.
- Bake for 35-40 minutes, until deep golden brown. If it starts to get a little too dark, tent it with a sheet of foil. When it’s ready, the loaf will sound hollow when tapped on the bottom. (If you have a thermometer, you can check that the internal temperature is between 190°F – 195°F.)
- Transfer to a rack to cool entirely before cutting. Store in an airtight container for up to a week at room temperature, or for longer if refrigerated.
This bread was ok but I experimented the second time and I really liked the results. I used minced fresh garlic and dried onion (2 Tbs.) instead of the onion and garlic powder and substituted 6 tsp herbes de provence for the basil, oregano and rosemary. It was delicious
Delicious recipe, Sarah! I put all the ingredients in my bread machine, set it on the “French” setting, and it came out great!
Tried twice and the dough consistency was not good.